If you read my last tutorial on network hacking with Pirni and Pirni Pro, then you would have acquired a vast knowledge of collecting network packets using Pirni and how to analyze them using a program called Wireshark. With this knowledge learned you now would have had the ability to collect sensitive information over a wireless network. While Pirni is a great application its only drawback is that there is no way to analyze the packets collect on your actual iPod Touch, iPad or iPhone. This can sometimes be a troublesome because if you do not have access to a computer you will not be able to analyze your sniffed packets.
While there is some ways around this, an example being iFile; an application that lets you browse internal files stored directly on the iPod Touch, iPad or iPhone. Actually analyzing packets on the iPod Touch, iPad or iPhone is a hard and tedious task to accomplish.
For one packets contain so many characters that analyzing them on such a small screen is extremely time consuming. Second of all, packets contain so much information if collected in numbers that actually looking through them all for passwords or sensitive information is a very hard thing to do. I was just about to give up the idea of browsing my collected packets on my iPod Touch when I came across a very useful plugin developed for use with Pirni called Pirni-Dev.
Introducing Pirni-Derv
Pirni-Derv is an extremely useful collection of bash scripts used in parsing captured network packets; specifically cookies, plain-text passwords, and URLS. This meaning that the packets collect from Pirni can then be analyzed in realtime on your iPod Touch, iPad or iPhone while simultaneously sniffing the wireless network. Pirni-Derv applies filters so it will only display to you important sniffed information like cookies, passwords, email address’s and visited URLS. If you never read my last post on network hacking with Pirni then I will briefly explain to you what Pirni is and how Pirni works. However if you are still confused please read my last post as it is the prerequisite to this tutorial.
Pirni is an application that was ported to The Ipod Touch/iPhone to be used as a native network sniffer. Pirni is so useful because it gets past the iPod Touch’s/iPhone’s wifi hardware limitation of not being able to be set into promiscuous mode (a mode that allows a network device to intercept and read each network packet that arrives in its entirety). To get past this limitation Pirni comes with an ARP spoofer that successfully routes all the network traffic through your iPod Touch/iPhone, records it to a dump file and then uses packet forwarding to send it to it’s normal recipient (ie. the router). What this basically means in simpler terms is that all the traffic on a specific network comes through your iPod Touch/iPhone before it reaches the router. This meaning that if we sniff the network long enough, another user connected to the network could enter in an unencrypted password and you could then retrieve that password after looking through your dump file.
As you hopefully now know Pirni is a great little application that runs in MobileTerminal that acts as an ARP Spoofer to intercept incoming network traffic, which is the recorded in a dump file. In this tutorial you are going to learn how to get passed Pirni’s limitations of not being able to analyze the packets collected directly on your iPod Touch, iPad or iPhone.
You will learn how to setup and install Pirni-Derv and you will learn how to use Pirni-Derv to collect sensitive information. As I stated above this tutorial assumes that you have read my last post as it is the perquisite to this tutorial. If you haven’t read it I recommend you at least look over it quickly because I am not going to go into as much detail on subjects like SSHing etc… to avoid being repetitive.
Preparing iPhone, iPad, iPod Touc For Pirni-Derv
Step 1) This first thing you are going to do, as you have probably guessed by this sections title, is prepare your iPod Touch, iPad or iPhone for Pirni-Derv. To get your device ready to run Pirni-Derv you are going to need to install the following applications through Cydia onto your iPod Touch, iPad or iPhone. Launch Cydia now and install the following applications through Cydia by searching for them in the search tab.
- MobileTerminal
- Pirni
- Gawk
- Network-cmds
- OpenSSH
**Note: as I stated above because this is an advanced tutorial I assume you know how to install an application through Cydia. If you do not know how to install or search for an application in Cydia then you should not be following this tutorial.
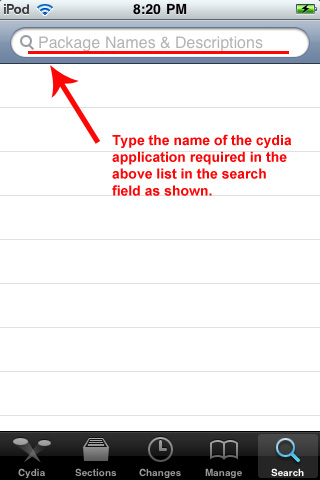
Type the name of the application above into the search field now and then install them
It is extremely important that you install all of these applications listed above or Pirni-Derv will not function correctly. Once you have installed the above applications to your iPod Touch, iPad or iPhone you can move onto step 2.
Step 2) Now that you have installed the applications that Pirni-Derv requires you can begin the process of installing Pirni-Derv. To do this you are going to need to manually add files to your iPod Touch, iPad or iPhone through an scp application like Winscp or Cyberduck. First of all before we transfer the files to your iPod Touch, iPad or iPhone you are going to need to download the actual files to your desktop; do this now by clicking one of the download links below:
Download Pirni-Derv as a .zip File (Windows) / .tar File (Mac OS X)
Once Pirni-Derv has successfully downloaded you are going to need to extract the files to your desktop. You can do this by right clicking on the .zip file and hitting the extract to desktop button.
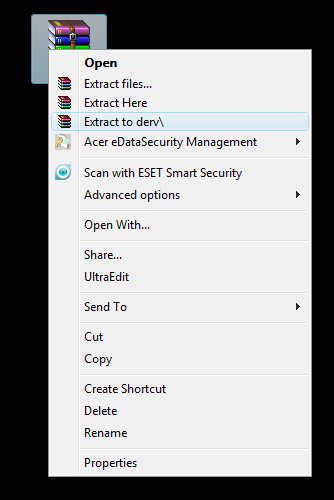
Right click on the .zip file and extract it to your desktop
Once the files have successfully extracted to your desktop you are going to need to download an scp application so you can transfer the files to your iPod Touch, iPad, iPhone. There are several applications that you can use an scp client such as Winscp (for Windows) or CyberDuck (for Mac). In this tutorial I am going to use the application Winscp because I am currently running windows. If you are on a Mac these instructions are almost identical to using the application Cyberduck so you can still follow along. You can download either Winscp or Cyberduck to your desktop now by clicking one of the download links below.
Step 4) When you have downloaded one of the scp applications above to your desktop you are going to need to install the application. Installing the scp application is a simple task to do simply double click the setup.exe file and you will be presented with the easy to follow steps of installing the application. I am not going to go into detail in installing either Winscp or Cyberduck because if you are following this tutorial I assume you know how to install an application.
**Note: plug your iPod Touch, iPhone, iPad into your computer now as in order for your scp application to function your device must be connected to your computer.
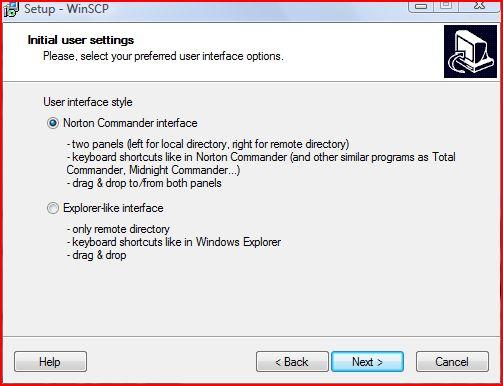
Follow the easy installion instructions to install your scp application
Once your scp application has successfully installed you are now going to launch the application by double clicking the short cut icon on your desktop.
Double click the WinSCP.exe shortcut to start the program
Step 5) Now that your scp application is up and running, you will be presented with a window similar the one depicted below…
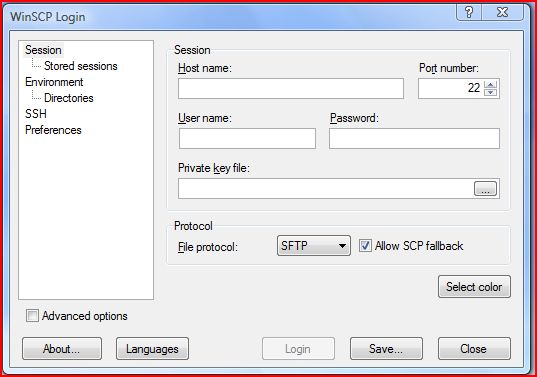
WinSCP up and running
The first thing you are going to need to do to browse your iPod Touch, iPad, iPhone’s file system is to enter in the Host name; which is your current networks IP Address (The network you are currently connected to). You can find your current networks IP Address inside Settings > WiFi >Your Network Name Tab. If you click the blue arrow next to your currently connected WiFi network you will see your IP Address presented to you.
The next thing you need to enter is the username, and this is always left as root (so type in root in the username field). The last piece of information you need to enter in is the password, the default password if you haven’t changed it is alpine. If you have changed your password then enter your current password in the password field now. Once you have entered in the correct information you can click the login button and Winscp will connect to your iPod Touch, iPad, iPhone.
**Note: the first time you use Winscp it can take a little while to establish a connection. Please be patient and if you get a security warning just hit okay to the message as it is necessary for Winscp to work.
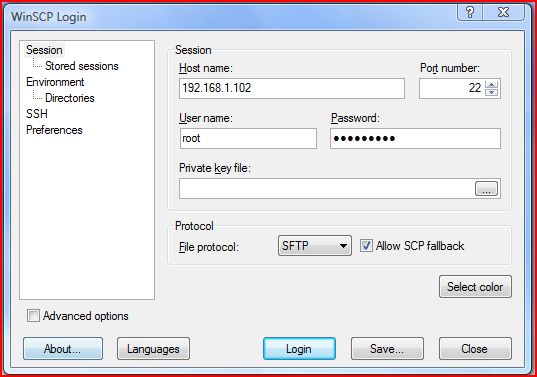
Your SCP Applications page should now look similiar to the image depicted below
Step 6) Now that you are connected via your scp application you are going to need to navigate to the following directory:
/private/var/mobile/
To navigate to this directory click the / button on the top right hand corner of the screen (This will take you to the root of your iPod Touch, iPad, iPhone).
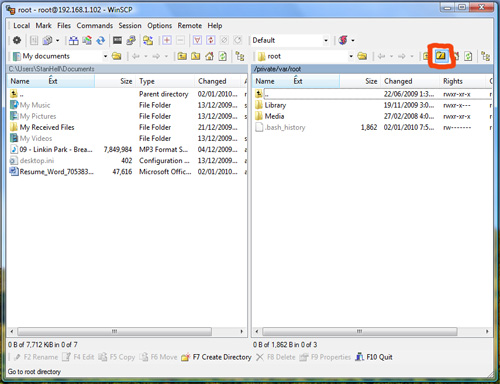
Click the / button in the top right hand corner of the screen
Once you are in the root directory double click the folder that is labeled private and then the folder var and lastly double click the mobile folder. You should now be in the correct directory and this is where you are going to transfer the Pirni-Derv files to. Navigate back to your desktop and and go inside the Pirni-Derv folder that you extracted earlier. Once you are inside the folder drag all the files that are in the Pirni-Derv folder to the directory in Winscp that you navigated to before.
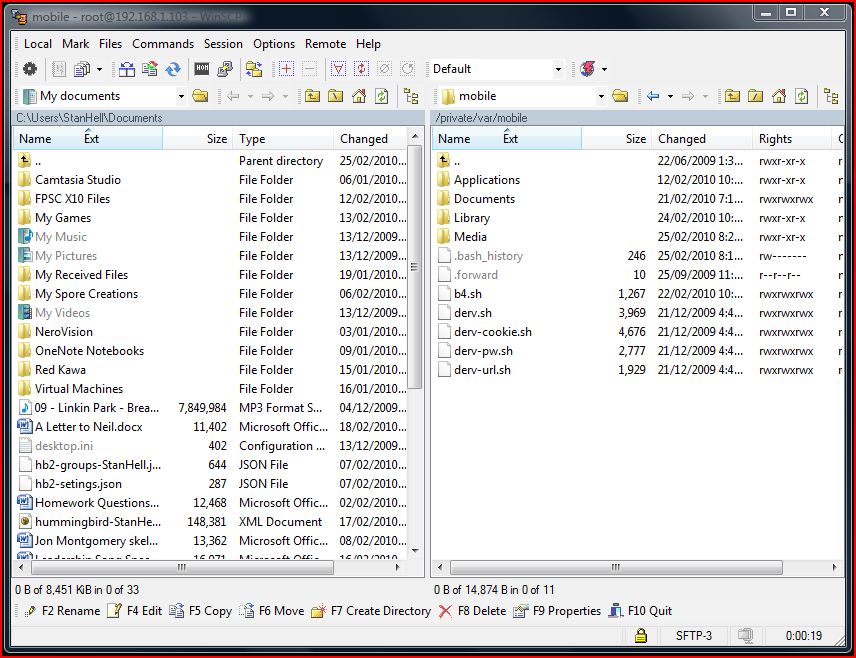
You should now see the 5 scripts listed below in the according directory
You should now see the following scripts in your /private/var/mobile directory:
- b4.sh
- derv.sh
- derv-pw.sh
- derv-cookie.sh
- derv-url.sh
If you see the five scripts listed above in the correct directory then you have successfully set up the correct file structure for Pirni-Derv. The last thing you need to do to correctly set up Pirni-Derv is to change the permissions of the five scripts we transferred.
Step 7) As you are now done transferring the files to your iPod Touch, iPhone, iPad you can now exit your scp application.
**Note: this is the directory that your Pirni dump files will be saved to so if you ever want to further analyze your dump files then simply repeat step 4-6 and drag your dump file to your desktop.
The last thing that you are going to need to do as I said above is change the permissions of the five scripts you transferred. To do this you are going to need to go onto your iPhone, iPad, iPod Touch and launch MobileTerminal which should now be on your SpringBoard. Once MobileTerminal is up and running you are going to need to login as a root user. What this will do is basically grant you administrative access to your iPod Touch, iPad, iPhone which is required anyways to do almost anything on MobileTerminal. To do this type the following commands below into terminal exactly as shown.
su
alpine (alpine is the default password. If you have not changed your password then use alpine)
Once you have typed the above commands into Terminal you should now be logged in as an administrative user or root user for short…
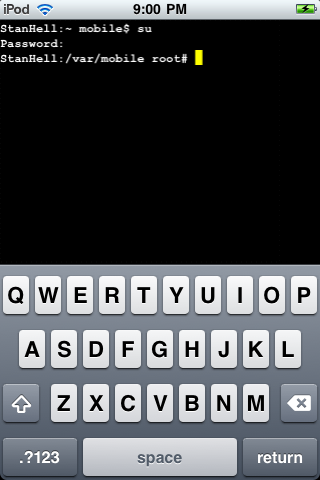
With the above commands enter your mobile terminal screen should look something like the image depicted
The next thing you are going to need to do is actually change the permissions of the five scripts you transferred over to your iPod Touch, iPad, iPhone. This will give the transferred scripts permission to carry out their specified tasks without running into any errors. Type the following below into terminal exactly as shown.
chmod 777 *.sh
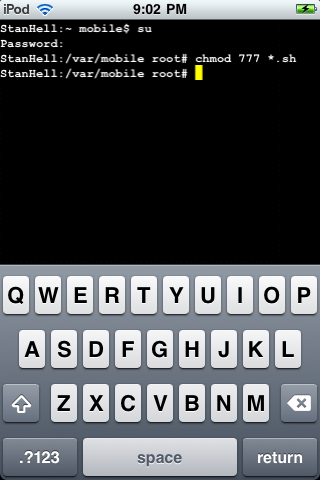
Type the command above into terminal and you will have succesfully set up Pirni-Derv
Once you have entered in the command above you will have successfully set up Pirni-Derv. With Pirni-Derv successfully set up you are now ready to learn how to use Pirni-Derv to its fullest.
Learning How To Use Pirni-Derv
Step 1) Now that you have successfully set up and installed Pirni-Derv you are ready to begin learning how to use the program. Pirni-Derv is a console application meaning that to run the application you have to run it through MobileTerminal (it does not have a Graphical User Interface). This means the first thing you are going to have to do is start up MobileTerminal; if you are not already running it. Once MobileTerminal is up and running the very first thing you need to do is log in as the root user as you did before. Type in the following commands into mobile terminal exactly as shown below…
su
alpine (alpine is the default password. If you have not changed your password then use alpine)
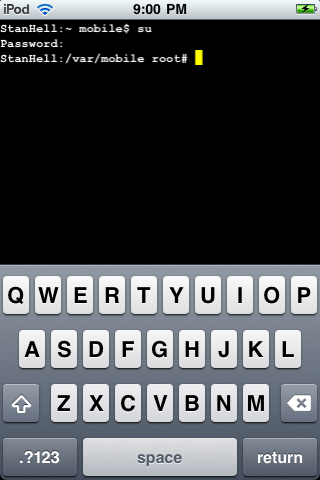
Log in as a root user as you did in the steps above
Once you are logged in as the root user you are now ready to begin using Pirni-Derv.
Step 2) The great thing about Pirni-Derv is that it completely automates the actual network packet collection by automatically entering in the appropriate filters, your router IP address, and the dump file name. This will make things a lot easier for you because now you do not need to look up your hosts router IP Adress; Pirni-Derv will automatically do this for you. To get Piri-Derv started you need to enter in the command below. This will start the b4.sh script which will perform the necessary actions to start the packet collecting process. Enter in the command below exactly as shown.
./b4.sh
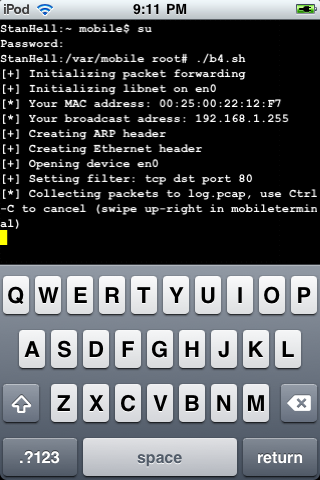
Once you enter in the command above Pirni-Derv will begin collecting packets
Once you have entered in the command above Pirni-Derv will begin collecting packets.
**Note: Sometimes Pirni-Derv can take a few minutes to start begging to collect packets, so be patient and wait till you have collected at least one packet before you move on to the next step.
Before you move on to step 3 however, Pirni-Derv features one more way to begin the packet collecting process that can be useful for users wanting to target the packet collection on a specific IP Adress (Device). This could come in handy for example if you knew someones IP Address for their iPod Touch, iPhone, iPad or other portable device you could target the packet collection on only their device. This would mean that you would only receive packets from their device. If you want to target a specific IP Address using Pirni-Derv enter the following command below instead of the one above.
./b4.sh 192.168.1.102
**Note: Replace the IP Address in red with your targets IP Address.
Step 3) Once you have chosen either to carry out the packet collection on the entire network or one specific device you will now learn what sets apart Pirni-Derv from regular Pirni. The first thing you are going to do is open up a new Terminal window. You can do this by taking your two fingers and swiping them across the Terminal screen in a right horizontal motion.

To open up a new Terminal window take both fingers and swipe them in a horizontal rightward direction
You should now be on a clean Terminal window while still running the packet collection on your targeted network/device. Again the first thing you are going to need to do is login as a root user so do this now by repeating the commands in Step 1. Once you are logged in as a root user you are now ready to learn what Pirni-Derv is all about.
Pirni Derv was developed to provide an easy to use solution to reading collected packet information on your iPod Touch, iPad, iPhone realtime or after your dump file is created. In this new Terminal tab you are going to initialize a script that will filter out useless tcp traffic and show you if anything interesting is collected, like urls, cookies or plain text passwords. To initialize the script you are going to enter in the following command followed by one or all of the shortcode prefixes below.
./derv.sh
- -u prints out URLs as they are visited
- -p prints out plain-text passwords as they are received
- -c intercepts and injects certain cookies into the device’s Safari’s cookies file
- restore restores cookies
- -d filters through the packet file once and does not delete anything. Useful if you want to see what’s in the packet dump file, but don’t want to lose the data. You only use this shortcode if you have a dump file you want to analyze after you are done packet collecting.
For example if you wanted Pirni-Derv to display to you the URLS visited by your victim that you are collecting packets from and also any passwords entered or recieved then you would type in the following command into MobileTerminal.
./derv.sh -u -p
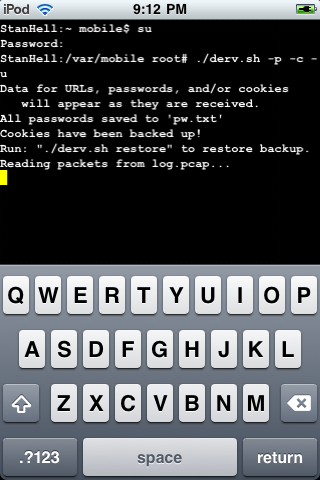
You should have entered something like the command entered below into MobileTerminal as depicted
If you entered the command above this will make Pirni-Derv display any urls or plain text passwords received realtime during packet collection. If you wanted to add cookie injecting/interception you would add the short code -c into your command. The short code -d is only used if you want to first collect all your packets using the ./b4.sh command and then once you are finished collecting them you want to analyze your dump file by using the shortcode -d. However one feature that is worth noting and explaining is the cookie intercepting and injecting of cookies short cut; -c.
Cookie Injection/Interception
This is really where Pirni-Derv becomes an advanced network hacking tool. If you add the short code -c to your command then Pirni-Derv will intercept any cookies that are received by the victim and transfer them to your safari so you can log in to the website they logged into as them because Safari thinks you are the victim you collected the cookie from.
Say for example a user that you are collecting packets from logs in to Facebook and clicks the remember me button, a cookie will be saved which means Pirni-Derv will intercept that cookie, transfer it to your iPod Touch, iPhone, iPad and now you will be able to login as if you were that user. However for this to work you will need to install a small program to your iPhone, iPad, iPod Touch. This program is called User Agent Faker and what this program does is make your safari run the as if it was a full desktop browser. This is necessary for the -c shortcode to work because cookies saved on mobile phones are different than cookies saved on laptops or desktop pc’s.
How To Install User-Agent Faker
To install User-Agent Faker type the name of the application into Cydia and install it to your iPhone, iPod Touch, iPad. When you install User-Agent Faker it will also install another application called SB-Settings. This is a program that I recommend to all jailbroken user because it adds simple short codes that will save you time and increase your productivity. To activate SB-Settings exit Cydia and slide your finger across the top bar on your iPod Touch, iPad, iPhone.

Install UA-Faker through cydia and then activate it through SB-Settings by swiping your finger across the top bar of your iPod Touch/iPhone and click the UA-Faker button
You should see a window come down and you should see a User-Agent Faker button, click it till it is highlighted green. Once you have it activated you are now free to use the -C shortcut and intercept cookies. When you manage to intercept a cookie go to the website that the cookie was from through safari and you will be automatically logged in as your victim. If you do not want to use this feature then you do not need to worry about installing User-Agent Faker.
**Note: If you want to turn User-Agent Faker off simply activate SB-Settings again and click the User-Agent Faker Button till it turns red.
Step 4) Once you enter in the command with the shortcodes that you require then you can sit back and wait for user entered information to be received by your iPod Touch, iPad, iPhone.
**Note: It could take some time for any actual information to come your way, generally it is good to scan for a good hour on a wireless network before anything useful will come up but you could get lucky. Scans on networks where many devices are connect will gain you better results than private networks where only one or two users are connected. When you are ready to end the packet collecting process swipe your finger in a horizontal direction across the screen and this will stop the script.

When you are done packet collecting and packet analyzing end the scripts by swiping your finger in a diagnol direction
If you used the -c shortcut; the cookie interception and injection you will need to enter the following command into terminal to restore your cookies to their original state. If you do not wish to delete the cookies intercepted then you do not need to enter this command, however if you do want to delete them enter the command below acordingly.
./derv.sh restore
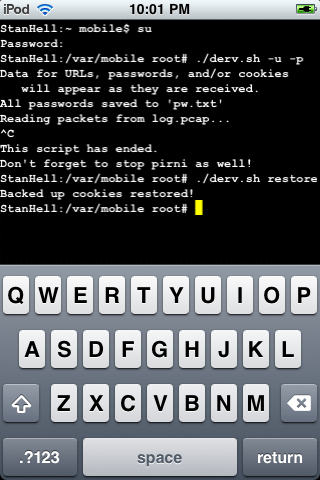
If you used to -c shortcode then make sure you restore your cookies to their original state when you are done with them
Once you have entered the command above or if you chose not to you will also need to end your other running terminal window. Take your two fingers and swipe in a rightward direction and you should see your other terminal window. As before take your finger and slide it in a horizontal direction across the screen this will end the packet collecting process.
**Note: Terminal is known to take up a lot of resources so it is important that you exit terminal when you are done using it by holding down a finger anywhere on the screen and clicking the exit button. This will exit mobile Terminal correctly and prevent it from running in the background.
Step 5) If you forget any of the scripts names then there is one small command that will show you the Pirni-Derv’s script names for reference. To do this simply type the command below into mobile terminal and you will be presented with Pirni-Derv’s script names.
**Note: You must be logged in as a root user for this to work.
ls
When you have entered in the small command ls presented to you above you will be shown each of Pirni-Derv’s scripts.
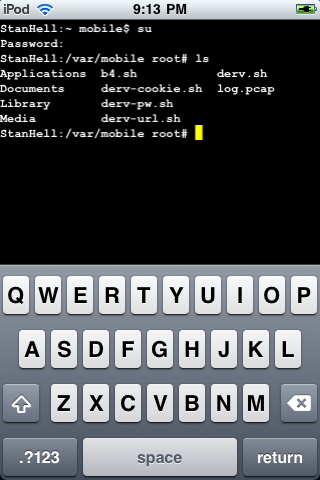
If you entered in the command above you will be presented with each of Pirni-Dervs scipts for reference
Conclusion
As you can see Pirni-Derv is a great plug-in for Pirni which extends its capabilities and makes hacking wireless networks on the iPhone, iPad or iPod Touch an easier process. Now that you have the knowledge to use Pirni-Derv you can now perform an advanced ARP Spoof (aka the man in the middle attack).
If you are interested in further analyzing your dump file then log back into ssh and go into the directory you transferred the scripts to. You should see a file name log.pcap, drag this to your desktop and you can further analyze it using a packet analyzer program like Wireshark. If you need assistance using this program then refer to my prerequisite tutorial. I recommend always analyzing your dump file after it is collected because there could be some useful information Pirni-Derv missed.
Leave any questions/comments in the comments section below.
Thanks this tutorial is great!! I was wondering if you knew how to spoof the mac adress on an iPod touch becuse I found out my schools wifi password but i think my school blocks mac adresses. It would great to be able to use pirni derv at my school!
Love the tut! This is exactly what I was looking for.
Thanks guys glad the tutorial helped you out! Issac212 if you want to spoof your mac address I think there is an application in cydia just search it up and install it and you will be good to go!
Thank you for tutorial. Do you know how I can add my own user agent string to UA Faker?
Hello there, unfortunately I do not know how you would go about doing this. I will search around and see if I can find anything but I think google might be your friend here. Best of luck!
How easy is it for one to detect the arp spoofing pirni performs? I heard tools like xarp work pretty well against the arp poison but wasn’t sure about pirni’s protection.
Also can the iPhone handle the bandwidth required to be the man in the middle with more than a few nodes on the network?
Hello Pat,
I assume that XARP would be able to detect pirni, however I am not completely sure. You would need to ask the creator of Pirni because I am not sure how well Pirni’s protection actually is. Also the iPhone can handle a lot of bandwidth I have tried using it on many large scale networks and it has handled well. The only problem is that the Log files can get very large on larger networks if you don’t apply filters. Best of luck to you. If you have anymore questions please feel free to reply!
so what if you wanted to intercept cookies from another iphone/itouch? would still run user agent faker?
Hello Chris,
I suppose that if you were intercepting cookies from another iPod Touch/iPhone you would not need this User Agent faker because the cookies will already be in mobile format. The only reason you would need to use User Agent Faker would be if you wanted to use Desktop Cookies!
DUDE this is one of the best apps….
But why the developer stops it ? Want SSL – plain….
Does somebody knows something ? or does somebody write a script for more features ?
Hmmm, your comment seems a bit spammy. We’re not real big on spam around here.
NO IT ISNT SPAMMY – STUPID FILTER
Hmmm, your comment seems a bit spammy. We’re not real big on spam around here.
This is SPAMMY – STUPID FILTER
ok sorry it was because my name …
No Problem DaGor,
But I have been in contact with the developers of Pirni and they have not stopped working on it they are actually working on creating a new version of Pirni with a GUI (graphical user interface). As for the SSL, so do I because most packets are encrypted in SSL if we had a decoder it would make things much better. Hopefully someone will port one to the iPod Touch/iPhone!
It’s no longer available in cydia. Does it support 3gs
looks like im going to spend alot of time here, lol i need help.
I have all the 5 things (very find to get all 5 now, especially gawk and network)
but when i type ./b4.sh
i get line 5-: pirni command not found. do you know why?
i have pirni pro btw though if that matters (the 2$ with live feed)
nvm i got it. I had to download the old pirni
btw people looking for gawk and network-cmds just google
“download gawk from cydia” or “network-cmds from cydia”
they are .deb files and then put it /private/var/mobile through ssh
an then just install through terminal (dpkg -i name.deb) (rename the .deb files u get so its easier when u type it in terminal)
where does pw.txt save to?
any1??
Hey O_o I am sorry I did not get back to you sooner I have been extremely busy the past couple of days! But anyways, Thank for your advice about fixing your problem you were facing with Pirni, I am glad you managed to figure it out. As for the PW.txt file it will either save to where your bash scripts are located or the following directory:
var/mobile/
tell me if you find them! Hope this helps! :)
@ O_o : i get a similar error… pirni pro … i also paid the 2 bugs
When I run derv.sh -c I get the following error:
./derv-cookie.sh: line 52: tr: command not found
Any idea?
i thought i had followed the directions very carefully. i get the following error: ./b4.sh: line 50: pirni: command not found
any ideas?
just caught something-i have the pirni pro. i suppose this only works with the old one?
Hello Brak,
sorry for the late reply. This will only work with Pirni-Derv, which isn’t necessarily an older version, but this version is only terminal compatible. It will not work with Pirni-Pro. Were you trying to get these commands to work with Pirni-Pro?
I can’t find the pw.txt can you explain that process more detailed thanks
I wouldnt mind some more clarification with how to get onto safari with -c. for instance:
Should terminal be on in the background while your on safari?
Is there a way to actually view the packets on the iphone?
@step 4, What should the screen look like? should it be blank like your picture, or should it just be open to the second terminal?
I realize how big an asshole i am being, but this was a great tutorial. I am just looking for more clarification for the cookie injection part. Thanks alot!
I know this is extremely late but I followed all of the steps listed above, except with cyberduck. I transferred all the files to my /private/var/mobile/derv directory. I get all the way to the last step, the terminal, and I always get the same message “no such file or directory”. Could you shed some light on this? I would greatly appreciate it. -Thank you
Thanks for the awesome tutorial, however when i try to use the ./b4.sh it says to me permission denied then i used the chmod 777 *.sh to get permission as u stated in the tutorial and i still cant use the ./b4.sh saying that it is illegal or something, and help ??