Wouldn’t it be cool if you could wirelessly control your computer with your iPod Touch, iPad, iPhone? There have been many attempts to make applications that allow you to do this via your device, however often these applications are complicated to set up and are often unresponsive. TeamViewer is an application that is here to solve all these problems and it lets you wirelessly control your computer (either PC or Mac) through your iPod Touch, iPad, iPhone. Through TeamViewer’s easy to use interface you simply download a client software to your computer and then login from the TeamViewer app.
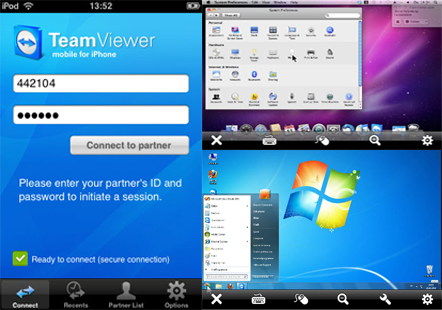
With TeamViewer you can now do everything you can do on your normal desktop computer from your iPod Touch, iPad, iPhone. The only difference is that you will be on a smaller screen and loading applications will take slightly longer. One thing that I was actually really impressed with was TeamViewer’s responsiveness and overall feel. With a little time put in to get used to the applications interface you can actually start getting pretty productive. The even better part about TeamViewer is that both the application and the app for your Desktop computer and your iPod Touch, iPad, iPhone is 100% free for personal use. That means that unless you want to use this application for your business or something like that you do not need to pay a penny to use it!
Learning How To Use TeamViewer
Step 1) The first thing you are going to need to do is install the TeamViewer Client and the TeamViewer application onto your computer and iOS device. I recommend you download and install the TeamViewer client fist by clicking one of the download link below.
Download TeamViewer for Windows / Mac OS X
Once the TeamViewer installer has downloaded double click the TeamViewerSetup.exe icon and start the installation process. Follow the screenshot instructions presented to you below to install the TeamViewer client to your desktop computer.
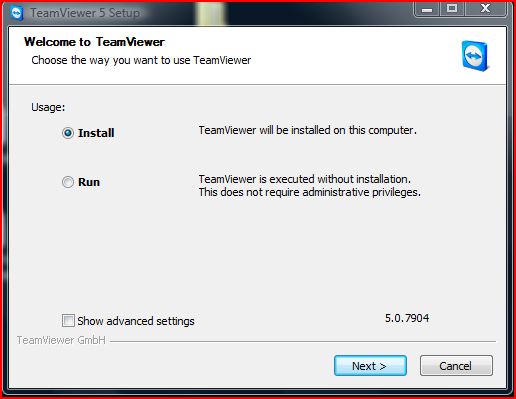
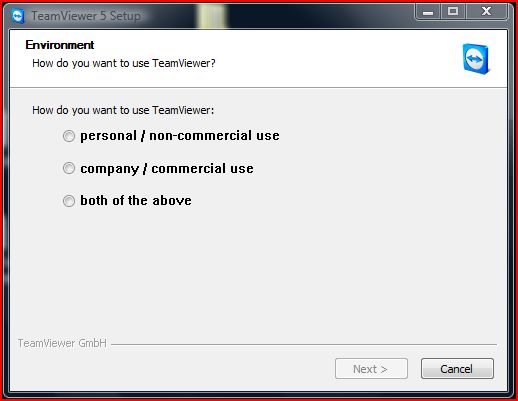
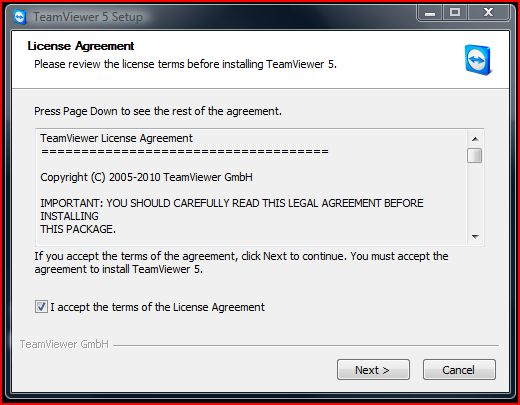
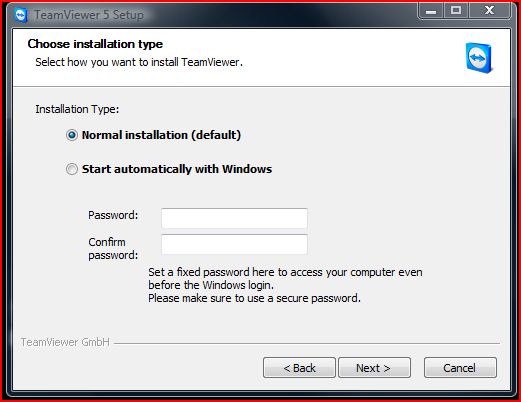
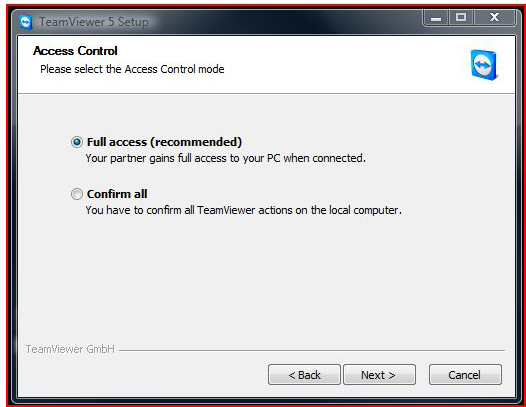
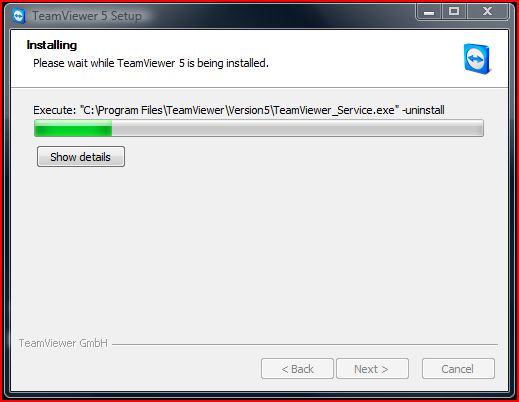
Step 2) Once TeamViewer has successfully installed you are now ready to install the application onto your iOS device. Navigate to the App Store (yes the App Store not Cydia) and type in TeamViewer into the search field. Once you see TeamViewer on your search results Install it.
Note: Do not install the TeamViewer Pro application; this application is only for if you wanted to use TeamViewer for commercial use (it does not provide any new features).
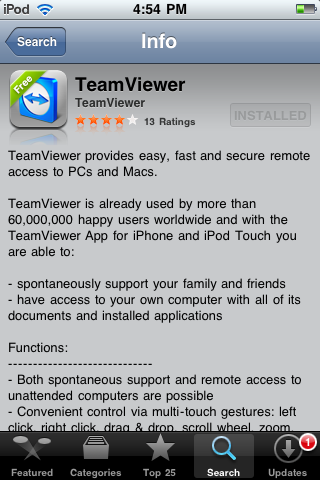
Step 3) Now that TeamViewer has successfully installed, click the app on your device so it is up and running. Do the exact same thing on your Desktop computer double click the TeamViewer shortcut on yourDdesktop so it is also up and running (if it is not already running). Once the two applications are up and running you are going to need to enter the information presented to you on your Desktop TeamViewer app into the TeamViewer app on your iOS device. Make sure you enter the information exactly as shown or your login will not work correctly.

Note: If you end up using the TeamViewer application a lot, then you can configure a permanent password to make logging in to TeamViewer an easier process. To do this click the configure permanent password link, below the login information and set up your password accordingly.
Step 4) Once you have entered the information correctly click the connect to partner button your iPod Touch, iPad, iPhone and you should now be successfully connected to your Desktop Computer. You should now see that you can control and do pretty much anything on your computer from your iPod Touch, iPad, iPhone. As well as when you are logged in you should see you now have an easy to use interface presented to you.
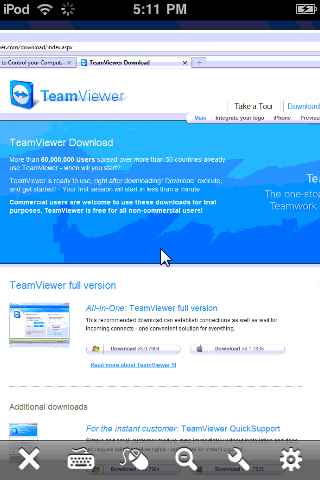
TeamViewer can be displayed in portrait mode or landscape mode (portrait mode is your iPod Touch, iPad, iPhone in the standing up position and landscape mode is when your iPod Touch, iPad, iPhone is turned sideways). I recommend switching to landscape mode because it will give you a wider perspective when working with TeamViewer.
Sometimes getting used to the controls can be tricky so I will go over some of the basic control functions below.
- Moving the Cursor: To move the cursor you simply drag your finger in the direction that you wish to move to and the cursor will follow your finger movement. You do not need to directly click on the cursor; touch anywhere on the screen and the cursor will follow your finger movement accordingly.
- Clicking the Cursor: To click the cursor simply position your cursor on the object you want to click and then single tap the screen. To right click you simply need to do a two finger tap on the screen.
- Dragging or Re Sizing a Window: To drag or resize a window you need to simply do a double finger tap and then hold and drag or resize your selected object/window.
- Mouse Wheel Function: To use the mouse wheel function simply tap the screen with two fingers and drag your fingers up or down the screen.
- Zooming in on an Application: To zoom in on an application you need to simply pinch the part of the screen that you wish to zoom in on and move your fingers slowly apart. You can also click on the magnifying glass icon in the bottom task bar.
- Typing (Virtual Keyboard): To type on TeamViewer you need to simply click the keyboard button on the bottom taskbar. This will bring up a virtual keyboard; if you click the + button on the top keyboard bar this will bring up misc keys like the up and down arrows as well.
- Rebooting your Computer: To reboot your computer click the wrench icon on the bottom task bar. This will bring up a small window giving you the option to reboot your Computer remotely.
- Alternative right Click: There are two ways to right click using TeamViewer. The fist way is by doing a two finger tap on the screen as I explained above. The second way is to click the mouse button on the bottom taskbar.
- Disconnecting from your PC: To disconnect from your computer simply click the X button in the bottom task bar. This will cancel your connection to your desktop computer.
- Viewing Settings: To view your TeamViewer’s settings simply click the gear icon in the bottom task bar.
Step 5) TeamViewer simply takes some getting used to before you can really be productive with it. There is only so much I can show you and then the rest is for you to figure out. One last option however that I will go over is TeamViewer’s settings. To access TeamViewer’s settings click the gear icon on the bottom task bar. Once you click the gear icon you will see several options presented to you.
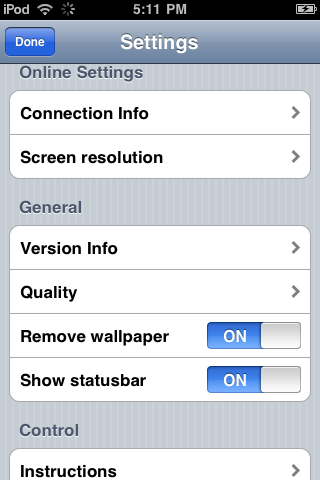
When you are inside TeamViewer’s settings tab you can see that there are quite a few options to play with. However most of these options are for debugging or logging which is only required for advanced users. The main options that are worth noting are as follows:
- Screen Resolution: If you click the screen resolution tab there are a few options presented to you; small, medium and native.If you click either the small or medium button this will change your computers resolution to provide a small increase of speed and responsiveness by TeamViewer. The native option is the default and when this option is enabled this will use your Desktops current resolution. The benefit of changing this option to small or medium would be only useful if you have a large screen resolution.
- Quality: If you go into the Quality tab you can change the display quality to optimize speed (responsiveness) or quality (the look and feel of applications). Generally you will want to set this to optimize speed because this will make TeamViewer run faster however if you are happy with how TeamViewer operates you can increase its quality instead.
- Connection Logs: There are several options for viewing connection and log files. These options are only for advanced users wanted to debug network connections and so fourth.
- Show Status Bar: The status bar is the bar that gives you information on the status of TeamViewer. If you wish to disable the status bar because it is getting in the way then you can turn the status bar off.
As you can see TeamViewer is a really cool application that lets you wirelessly control your Computer from your iPod Touch, iPad, iPhone. This can be useful in so many ways depending on what you wish to use TeamViewer for. You can leave any questions or comments in the comments.
Leave a Reply