Let’s face the facts here when you buy an iPhone you are paying over $200 and then on top of that a monthly fee anywhere from $60+. Once you get your iPhone your then going to want to buy games, applications, movies, music and Ringtones for your iPhone. The bad news is, is this all is going to add up very fast and if your not making a lot of money this is all going to be one very expensive bill at the end of the month. However the great thing about anything electronic is that there is always a way to bend the rules and get some things for free; one of these things being is ringtones.
If you buy ringtones off iTunes this is going to cost you money and this is pretty pointless if you have already bought the song! Why should you need to pay for 30 seconds of a song that you already have? or even come to think of it why should you have to pay for 30 seconds of a song when you can listen to 30 seconds of a song for free on iTunes? In this tutorial you will learn how to create your own ringtones for free. We will be using a free program called MAGIX Ringtone Maker that will simplify the process of creating your ringtones and make this process an enjoyable experience.
Step 1) The first thing we are going to need to do is download MAGIX Ringtone Maker.
Step 2) With the application downloaded you are now going to need to install the program to your computer. Follow the screenshots below to install MAGIX Ringtone Maker.
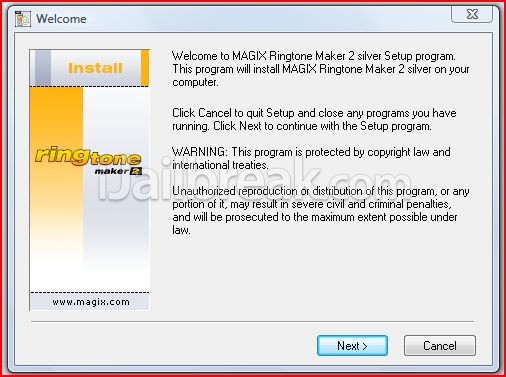
Read the Starting Screen instructions and press the Next Button.
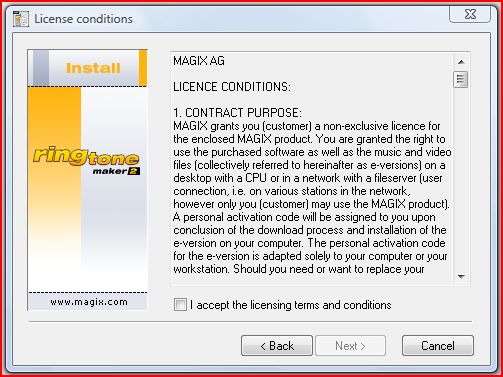
Read and agree to the Terms of Service and click the Next Button.
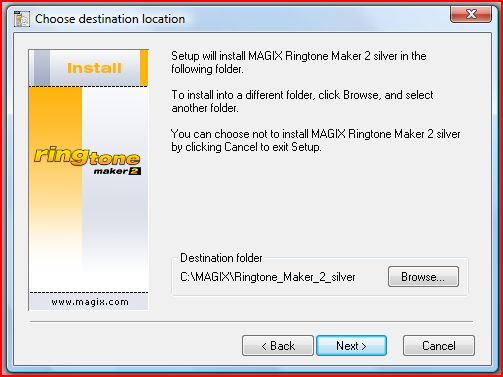
Choose the installation path (Default C:/ Drive recommended) and press the Next Button.
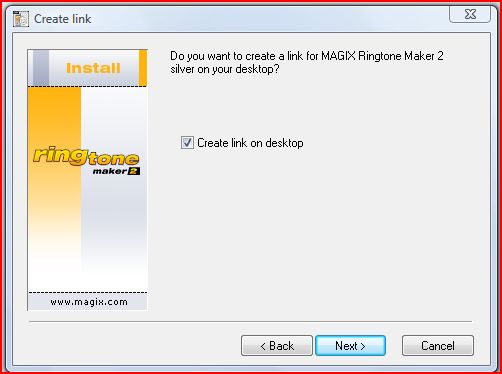
Choose create a desktop shortcut and click the Next Button.
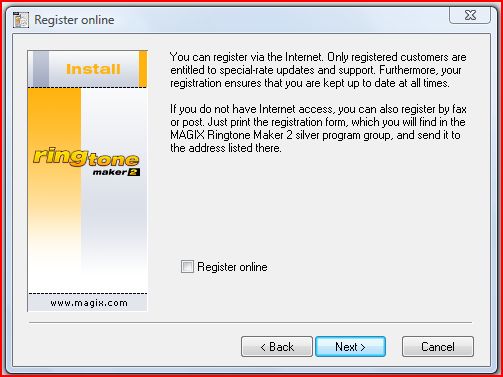
Click the register button if you wish to register or leave it unchecked if you do not. Click the Next Button to continue.
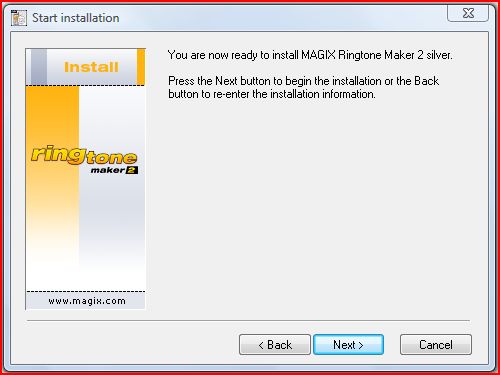
Click the Next button to install MAGIX Ringtone Maker Now.
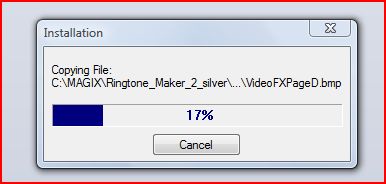
Wait for MAGIX Ringtone Maker to finish installing. Once MAGIX Ringtone Maker is installed on your computer click the Finish Button and continue to step 3 below.
Step 3) With MAGIX Ringtone Maker now installed on your computer you are now going to double click the shortcut on your desktop to start the program.
**Note: if you are on Windows Vista make sure you run the program as administrator or you will run into errors. Simply right click on the program and click run as administrator…
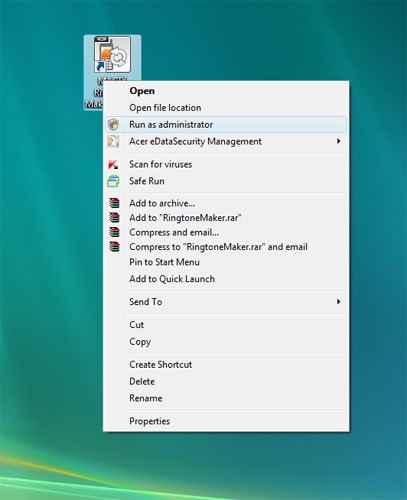
Provide Administrative Acess to MAGIX Ringtone Maker if you are on Windows Vista.
Step 4) With the application now launched you are going to begin creating your Ringtone! Before you get to work on creating your Ringtone though you are going to need to choose a song in which you are going to make your actual Ringtone out of. Locate the song that you want to create your Ringtone out of and then place it in your MyDocuments folder. Once you have placed your song in the MyDocuments folder you can now go back to MAGIX Ringtone Maker.
Step 5) To begin the process of creating your ringtone click the computer icon on the top left side of the screen and select the MyDocuments Folder. This is the folder that your Ringtone should be in. Select your Ringtone music file and then click the import content button; MAGIX Ringtone Maker will now import your song into editing field.
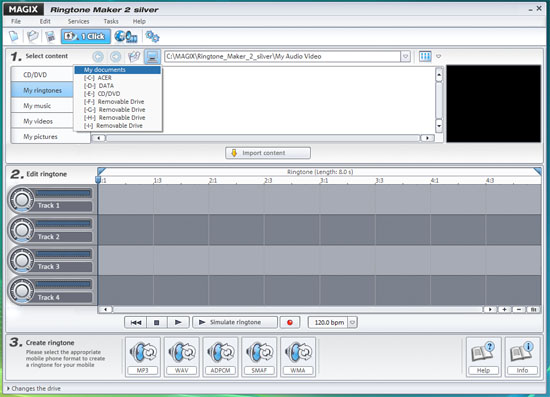
Select the Documents Folder option.
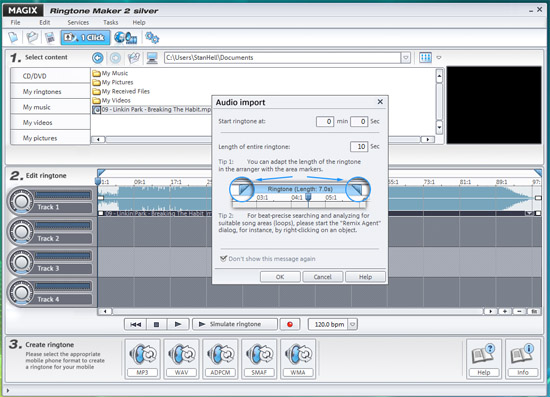
Leave these options the way they are and click the ok Button.
Step 6) Now that your Ringtone is in the editing field there are a few things that you can do to make your Ringtone just how you want it. I am going to explain a few key features of editing and creating your Ringtone…
Timeframe Editing:
When you are creating your ringtone there are several things you can do to edit your ringtone to make it sound just right. The first thing we are going to learn how to do is choosing the length of your Ringtone. The average length of a ringtone is about 30 seconds, so when you are creating your ringtone aim it at around 30 seconds. To edit how long you want your Ringtone to be you simply click and hold the corner of the blue bar on the top of your Music file as depicted below…
**Update I just discovered that users are having problems with their Ringtones not showing up on their iPhone. This is because your iPhone does not accept ringtone files over 30 seconds so make your Ringtone 30 seconds exactly or slightly shorter.
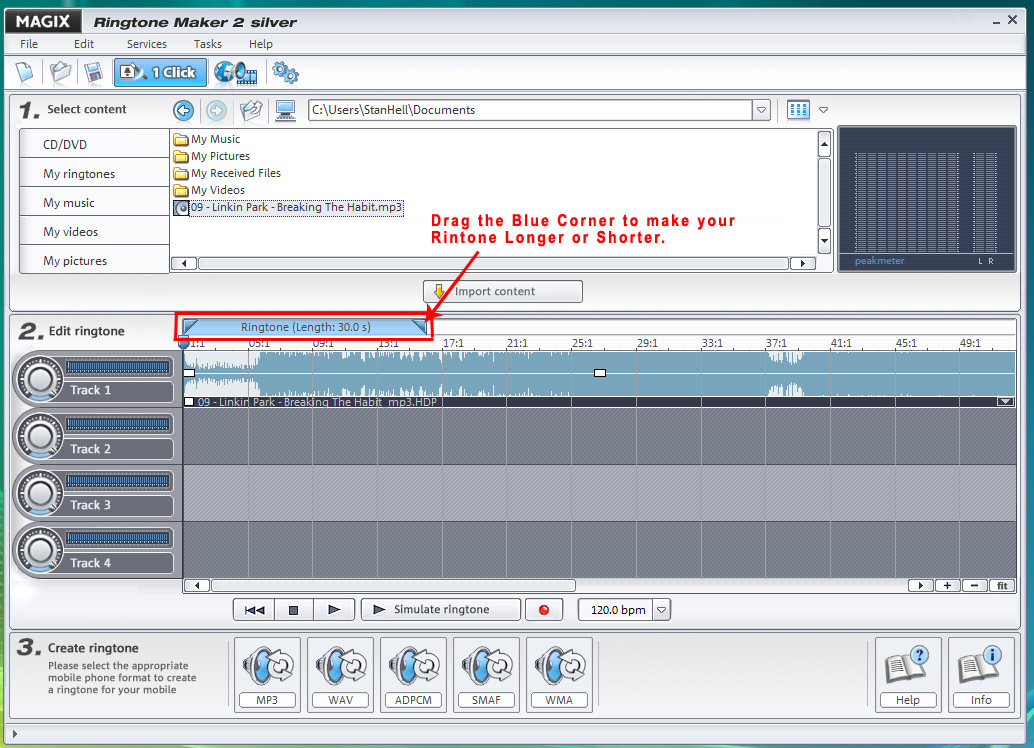
Select the Corner of the Blue bar to change the length of your Ringtone.
Another thing that you might want to do is choose a certain part of your song for your Ringtone to start at. We can do this by simply clicking the Middle of the Blue bar and dragging it to the part of the song that you want your ringtone to start at.
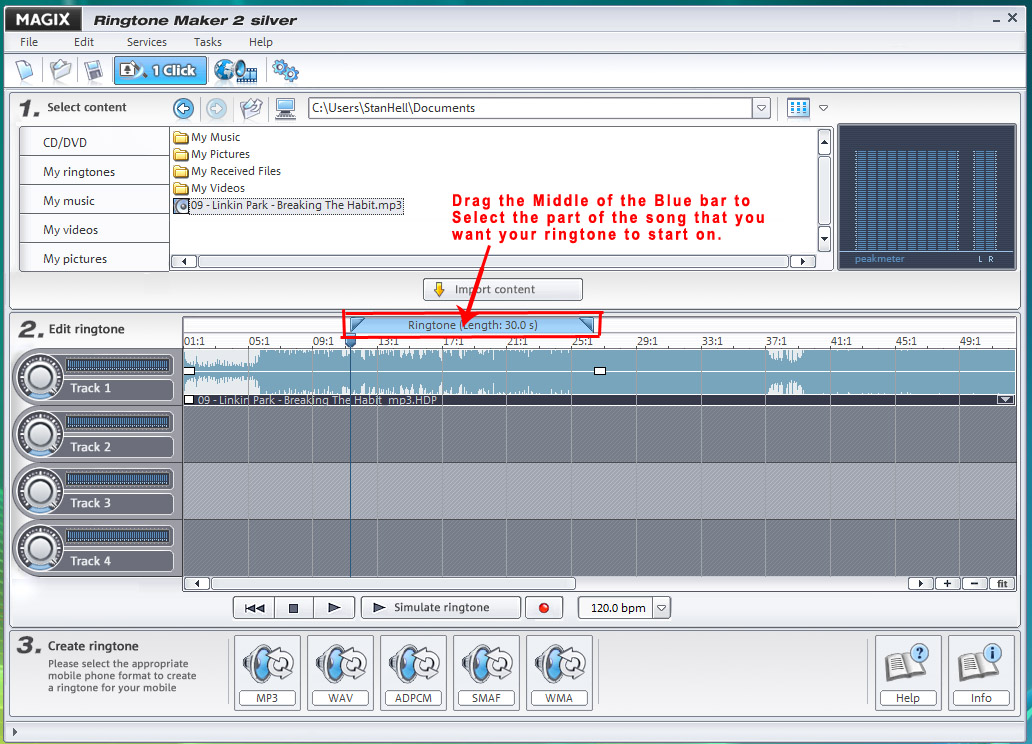
Click the Middle of the Blue bar and drag it to the part of your song where you want your Ringtone to start.
Spliting:
Splitting is taking a part of your song and cutting it out from the rest of your track so you are free to edit that part of the song independently from the rest of the song. With splitting you can also combined two parts of a song and place them together. To split a part of your song you click on your track and then simply position the blue timeline arrow to the part of the song that you want to split. Once you position the blue timeline arrow to the part of the song that you want to split go into the toolbar on the top of the application and click EDIT > SPLIT OBJECT as shown below…
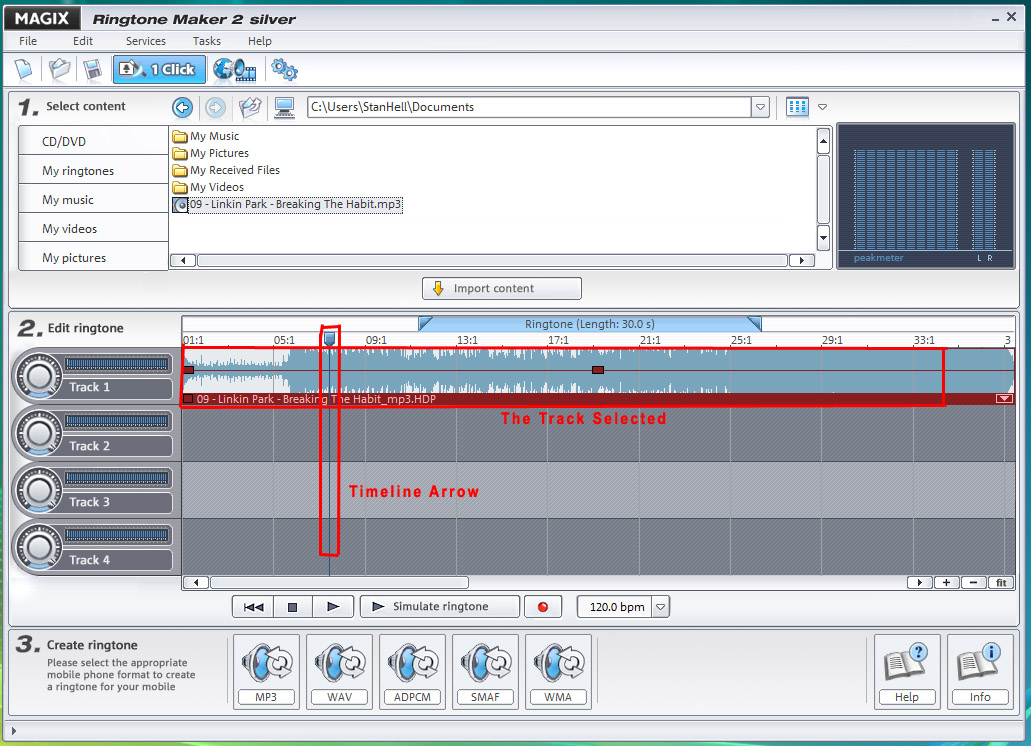
Click on your Track and then Select the Timeline Arrow and move it to the position you want to split your song.
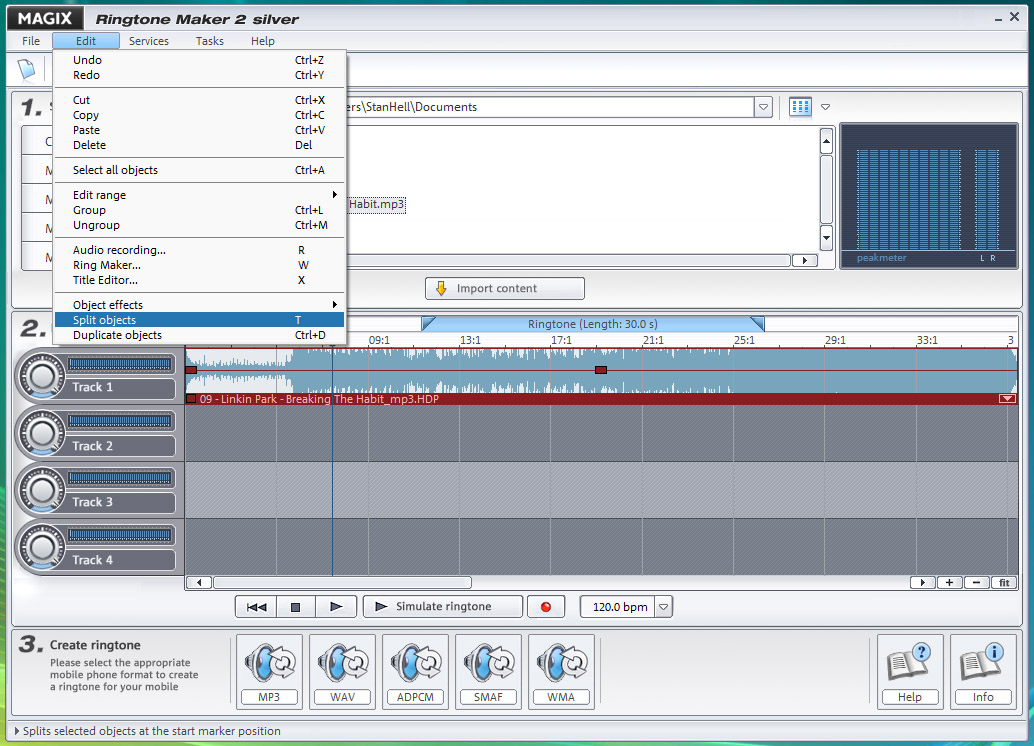
Go into the top toolbar and click Edit then Split Objects.
Once you split the part of your song you are now free to either delete it, move it wherever you want on the timeline or even apply specific sound effects independently from the rest of the track.
Fading and Sound Levels:
For a Ringtone to sound great you usually fade in the Ringtone when the ringtone starts and you then fade out the Ringtone when the Ringtone ends. To do this in MAGIX Ringtone Maker is a simply task, and if you look on your sound track bar you should see a red line going through the middle of the track. To Fade in your Ringtone you can simply drag the red box that is closest to the beggining of the track and slide it to the right. To make your Ringtone fade out simply drag the red box at the end of your Ringtone and slide it to the left. Look at the screenshot below for a visual depiction…
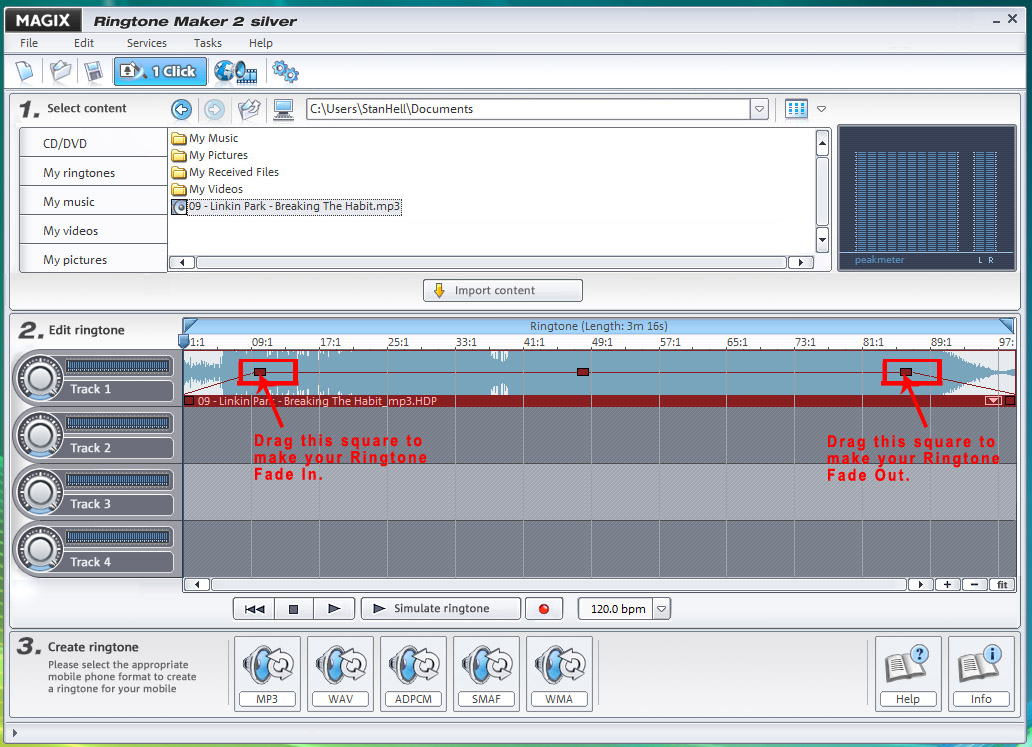
Drag the red squares at the ends of your Ringtone to make your Ringtone Fade in or Fade out.
If your Ringtone is too loud or too quite there is a simply way to adjust this. Drag the red square in the middle of your Ringtone and drag it up to make the volume increase or drag it down to make the ringtone quieter. Look at the screenshot below for an example…
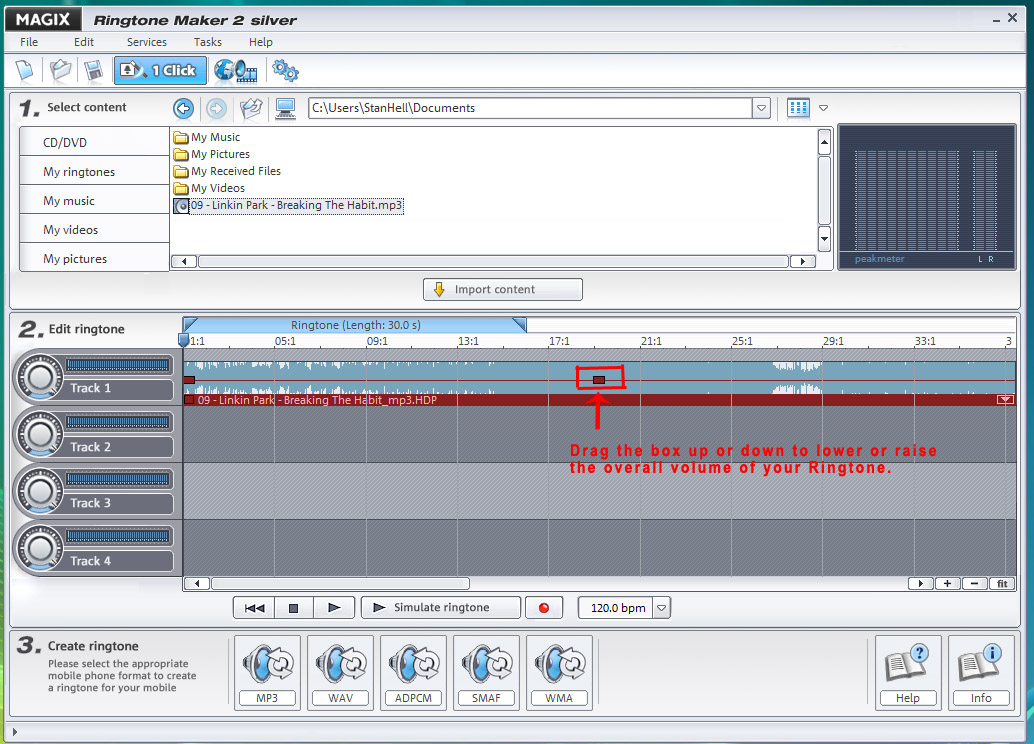
Drag that square in the middle of your Ringtone to raise or lower the volume of your Ringtone.
Finalizing:
With MAGIX Ringtone Maker there are many more things that we can do to further customize your Ringtones. I am not going to go into advanced editing of your Ringtone in this post however now that you have learn’t the basics you are free to experiment with the other options MAGIX Ringtone Maker posses. When you are finished editing your Ringtone you can preview your Ringtone by Pressing the Play Button or the Simulate Ringtone Button. The play button will play the song as it will sound through your speakers and the Simulate Ringtone Button will give you an idea of what your Ringtone will sound like on your iPhone.
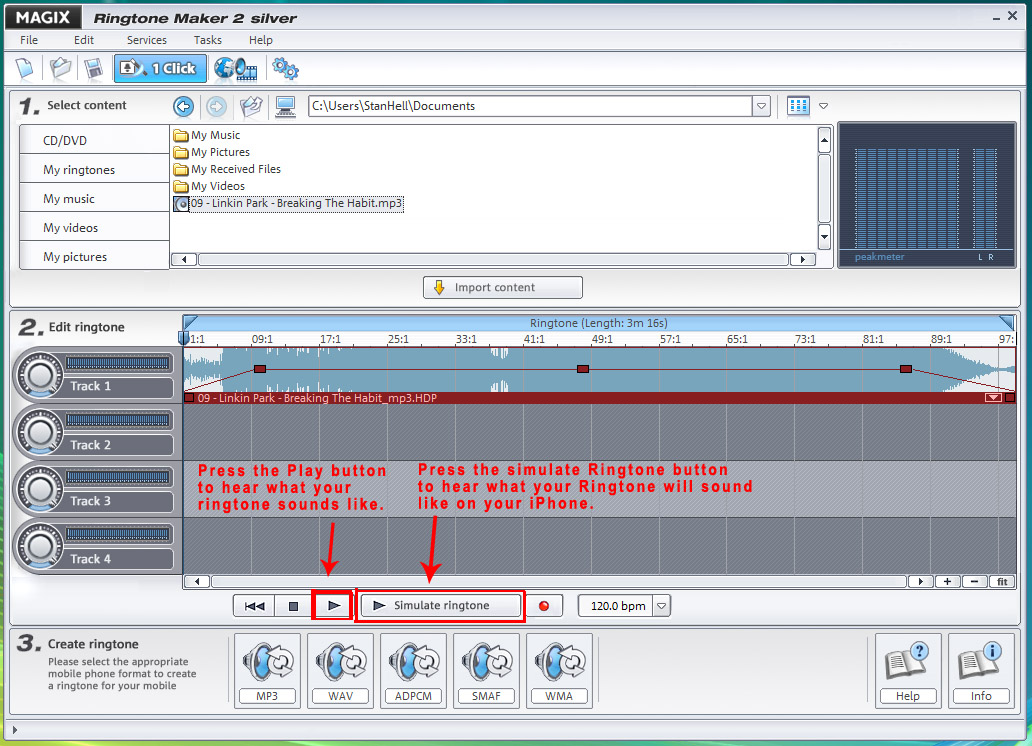
Press the Simulate Ringtone Button or the Play Button to hear your Ringtone.
When you are happy with how your Ringtone Sounds continue to Step 7 to publish your Ringtone.
Step 7) Once you create a Ringtone that you are happy with your last step is going to be actually publishing your Ringtone. In the bottom of the screen you should see 5 big buttons with different sound formats labeled on them. The button that you are going to click is the MP3 Button.
**Note if you didnt see the warning in the steps above make sure before you publish your Ringtone that it is no longer than 30 seconds or it will not work on your iPhone.
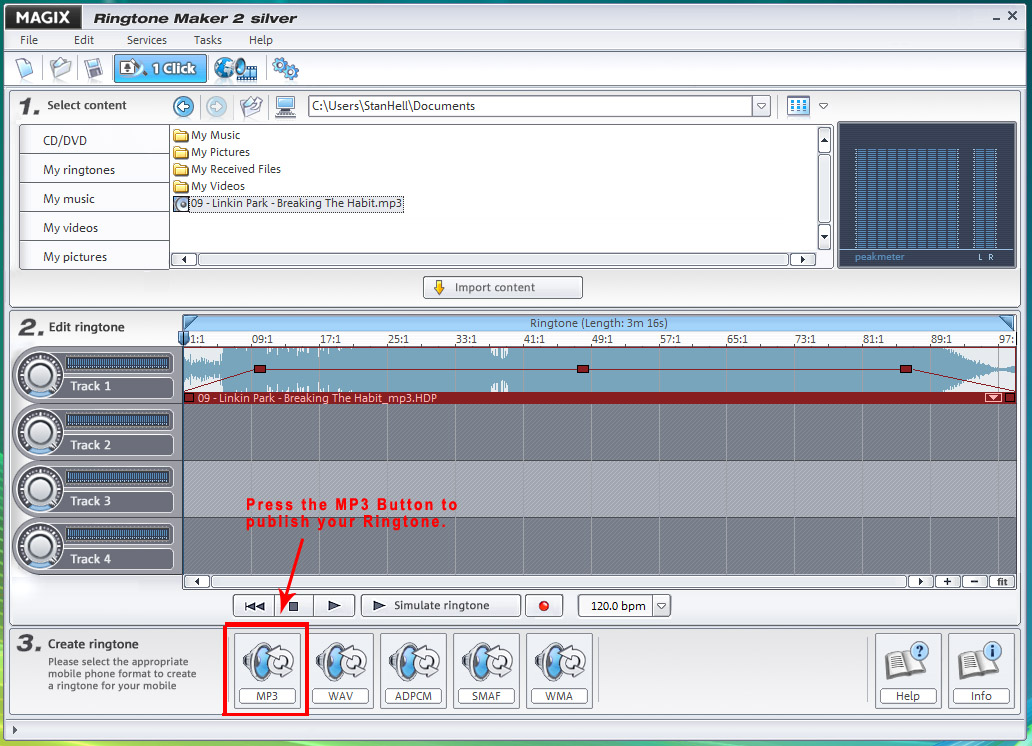
Press the MP3 Button to Publish your Ringtone.
Once you click the MP3 button another screen will pop up with a few more options. We are going to want our Ringtone file to appear on your desktop so go into the storage location options and select your Desktop as the place to publish your Ringtone. The next thing you are going to need to change is the bitrate. Change the bitrate to 32kb/sec (You can make the Ringtone 64KBit/s all this will do is make the Ringtone higher quality at the cost of space) and then you can click the OK button to publish your Ringtone to your Desktop.
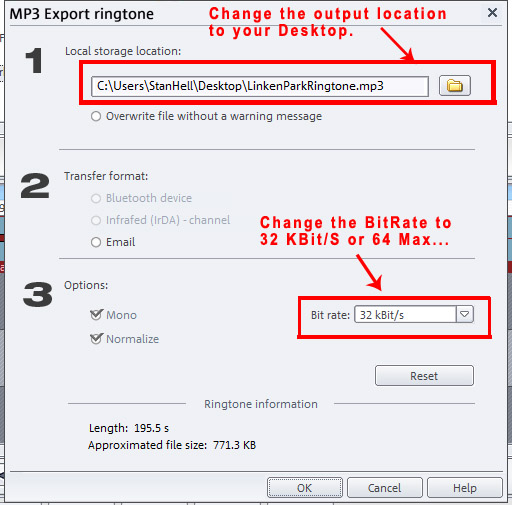
Copy the Following Options into your Publishing Screen.
Step 8) Now that your Ringtone has been created the Next thing we need to do is add it to your iPhone. To do this we are going to need to launch iTunes and we are going to need to import your Ringtone to your iTunes Library. You can do this by going into the top toolbar in iTunes and clicking the FILE > IMPORT FILE TO LIBRARY Buttons…
Once your Ringtone File has been added to iTunes search for it now in the search pane. Once you find your Ringtone file you are going to right click on your Ringtone and convert it to a .acc version. Once your Ringtone file has been converted drag it on to your Desktop.
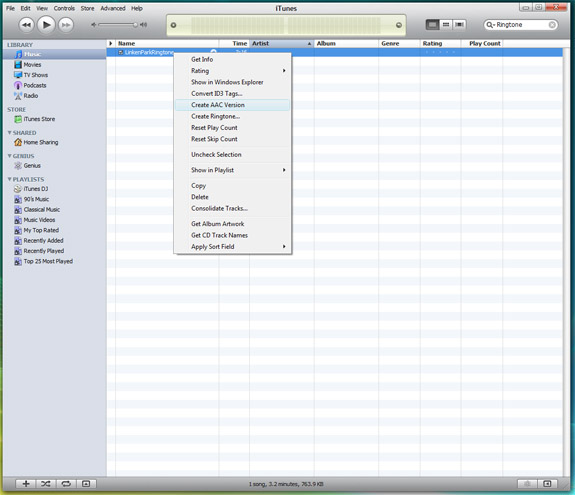
Right click on your Ringtone and click create a .acc version.
Once your .acc version of your Ringtone has been dragged to your desktop you should now have the file *yourfilename.m4a* on your desktop. What we are going to do now is rename the file to *yourfilename.m4r*. You can do this by right clicking on your Ringtone file and clicking the rename as button shown below…
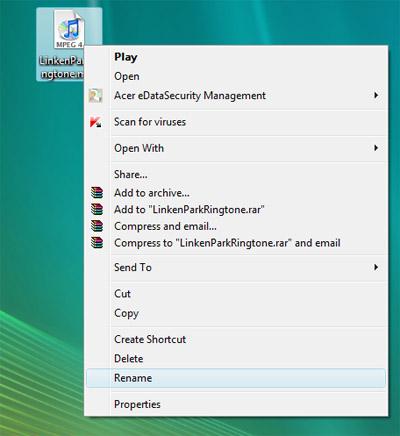
Right Click on your Ringtone and click the Rename option.
Once you click the Rename option you are going to Rename the file extentsion to *.M4R*. Once you have renamed the file press the enter button and a warning message will appear. Simply click yes to this warning message…
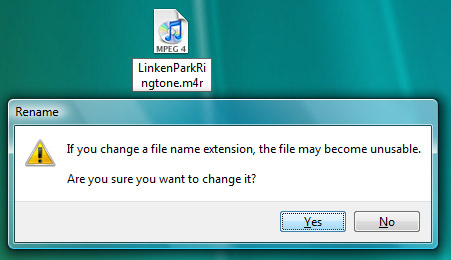
Click yes to the Warning Message
Once you have renamed your Ringtone File double click it and it will now appear in your iTunes Ringtone Section. You are now free to hit sync ringtones Button and your newly created Ringtone will appear on your iPhone. If you have any questions regarding this post or need any help please feel free to leave a comment.
Great tutorial! I know it’s a little older, but for those that don’t want to install a new program to their computer, you can always make free Ringtones using iTunes. It’s a little less visual than highlighting and cropping music, but for those that want to do it really quickly and easily:
1 – In iTunes preferences, (Edit – Preferences – Import Settings) change your Import Settings to AAC. (Either “high quality” or “itunes plus” will work)
2 – Play the song or file in iTunes that you want to make a ringtone of.
3 – Make note of the start and stop time for the portion of the song you want. Do not use any more than 30 seconds of the song or you will encounter problems.
4 – Right click the song and click “Get Info”
5 – On the Options tab, enter the start and stop times you made note of in step 3
6 – Click OK
7 – Right click the song and click “Create AAC version”
8 – After it’s done, right click the song again and on the Options tab erase the start and stop time you entered in step 5 (this will put your song back to the original version.)
9 – Find the AAC version that you just created (it should be shorter than 30 second duration) and right click on it. Click on “Find in Windows Explorer”
10 – If you see the extension of the file is .m4a, simply click on the name and rename it to .m4r. (If it says the file is in use, close iTunes and try again.)
10a – If you don’t see the extension, click on Tools, then Folder Options. On the View tab scroll down until you see “Hide extensions for known file types” and remove the check mark. Click OK.
11 – Once your file is a .m4r file, double click it. iTunes will play it, and automatically put it under “Ringtones” category on the left side of iTunes (where you see Music, Podcasts, Audiobooks, etc.)
12 – After connecting your iPhone, simply drag it over and you’re good to go.
It is a bit of a hassle the first couple of times, but once you get the hang of it, you can convert anything in your iTunes library into a ringtone in a matter of seconds!
Eep. I only looked at the first half of the tutorial. Jeez! Sorry!
Don’t even worry about it eTom! Thanks so much for providing an alternative solution to creating ringtones I really appreciate you adding to this website! If you ever need anything let me know! :)