A few days ago we told you about a new project being developed with the help of @cale250 dubbed SiriServer that will actually replace the need for Siri to contact Apple’s server altogether. This is because instead of using Apple’s servers for the speech processing SiriServer uses Google Speech-To-Text API. While this is a great development because it takes away the need for iPhone 4S Authentication keys (you no longer need to have access to an iPhone 4S), it does mean that you are limited to commands that are shorter than 10 seconds. The developer notes that he may be able to overcome this, but at this time this 10 second command limitation is here to stay.
For those of you who were interested in setting up a server using SiriServer you will be glad to know that in this how to guide from iJailbreak.com you will learn how to setup SiriServer on a Linux computer or Linux virtual machine. This will allow you to use Siri on your older generation iOS device thanks to the Spire Cydia tweak without the need of iPhone 4S authentication keys.
Note: Please keep in mind that SiriServer will work on Mac OS X, but in this tutorial we will be setting it up on Ubuntu (a form of Linux).
Setup SiriServer Ubuntu
Section A: Setting Up The Required Components
Step 1 Windows: For Windows users it should be fairly easy to get Ubuntu working on your computer (as there is numerous ways). Probably the easiest way to do this is to go to the Ubuntu download page by clicking here, and then simply following the instructions for dual-booting your computer with Ubuntu. You could of course also use a Virtual Machine (like virtualbox), or boot Ubuntu from a CD or USB drive.
Step 1 Mac OS X: For Mac OS X users your options of running Ubuntu are slightly more limited. You can either use a Virtual Machine (like virtualbox) or of course you can boot Ubuntu from a CD or USB drive by clicking here.
Step 2: Once you have found a way to get access to an Ubuntu computer you will need to launch terminal and type in the following command:
sudo apt-get install libspeex1 libflac8
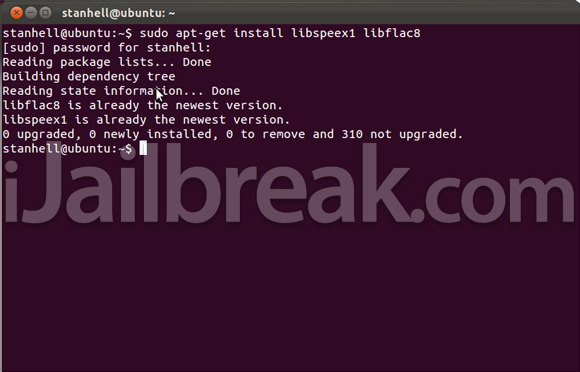
Tip: If you do not want to type all of the Terminal commands shown in this tutorial you can copy the command and paste it into Terminal by right clicking and then clicking the paste option.
Step 3: Make sure you keep Terminal open, as we will come back to it soon, but you will now need to open the Ubuntu Software Center. Once the Ubuntu Software Center is up and running you will need to search for the following:
Python

When you see Python on the search results (it will be labeled interactive high-level object-orientated language (default version)) you will need to install it to your Ubuntu computer.
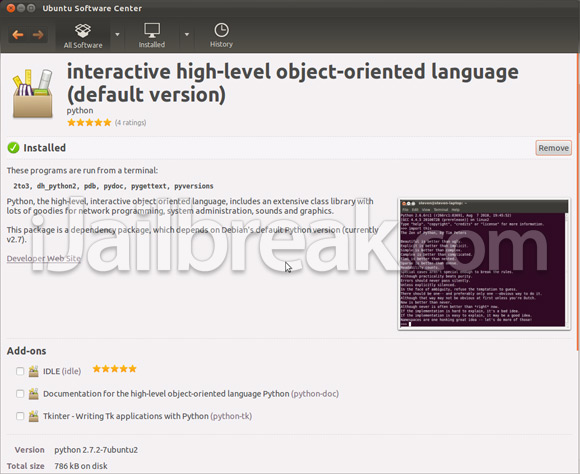
If you do not see an Install button, but rather a Remove button this means you already have Python installed and can move on to step 4.
Step 4: Next you will need to install another package to your Ubuntu Computer, thus search for the following through the Ubuntu Software Center:
M2Crypto
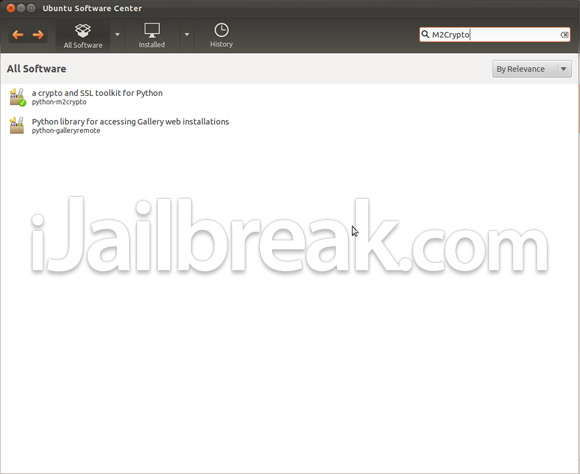
When you see M2Crypto appear on the search results you will need to click it and install it your Ubuntu computer.
Step 5: We will now be exiting the Ubuntu Software Center and going back over to terminal. With Terminal resumed you will need to enter the following command:
sudo apt-get install python-setuptools
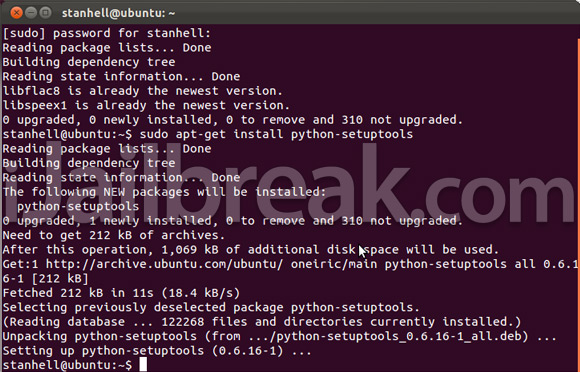
Step 6: Once the command above has been executed you will need to enter the command shown below:
sudo easy_install biplist
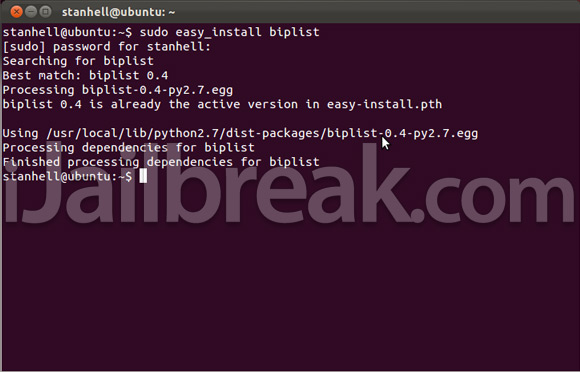
Step 7: It is now time to download the SiriServer files. Go to the official SiriServer GitHub page and download the files as .zip file by clicking here.
Step 8: Extract the the file you just downloaded and rename the folder to:
siriserver
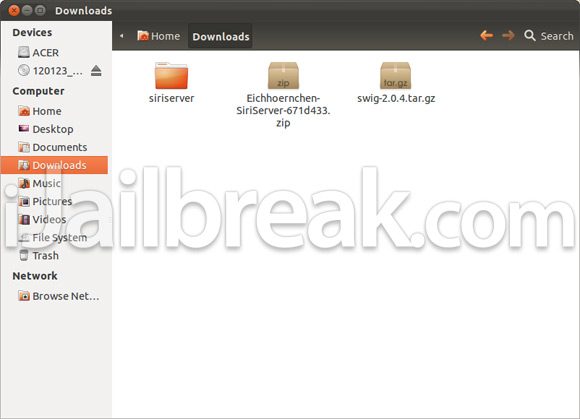
Step 9: Now go back to Terminal and type in the following command to go into the Downloads directory:
cd ~/Downloads
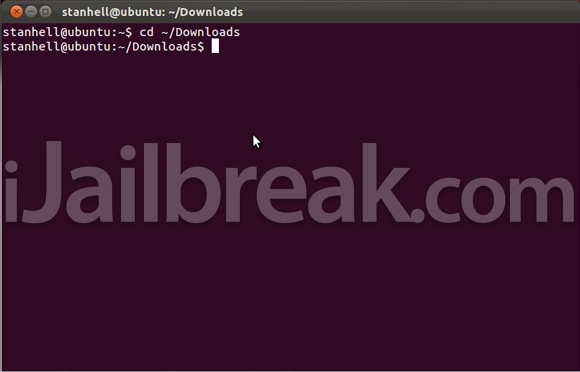
Step 10: Next type in the command shown below to move the SiriServer files into your Ubuntu root directory:
sudo mv siriserver /
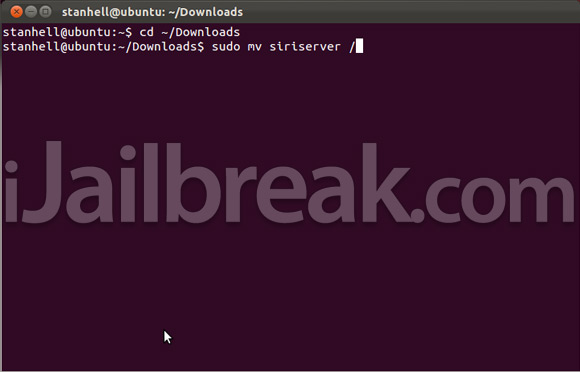
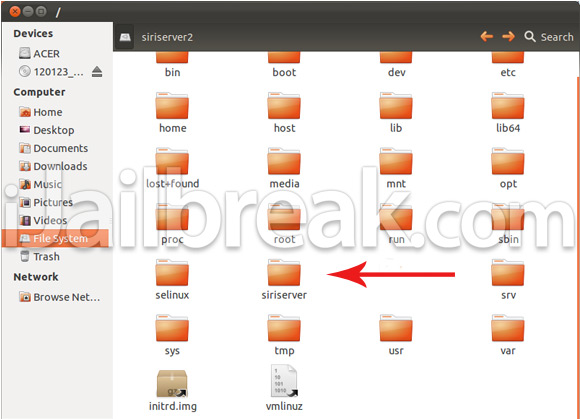
Note: It is recommend that you double check to see if your SiriServer folder was indeed moved to the the Ubuntu root directory. To double check this open up a folder, go into the File System tab and you should see siriserver sitting there.
Section B: Generating Your Certificate
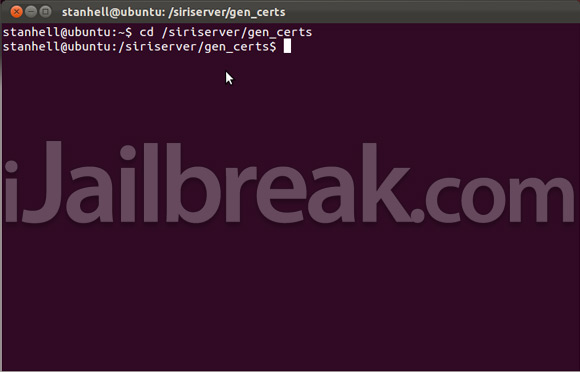
Step 11: The SiriServer files have now been placed in the correct directory. We have now setup all of the required components for SiriServer to work. Congratulations for getting this far! We will now start generating the certificate for your iOS device to properly connect to the server you are creating. To do this the first thing you need to do is go into the proper directory:
cd /siriserver/gen_certs
Step 12: From here you will need to enter the command shown below. Keep in mind, however, that you will replace XXXXX with most likely an IP Address or in some cases a domain name (for more information click here).
./gen_certs.sh XXXXX
Example: ./gen_certs.sh 192.168.1.1
OR ./gen_certs.sh domain.com
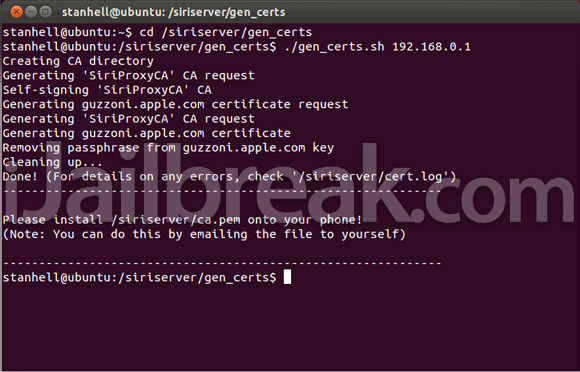
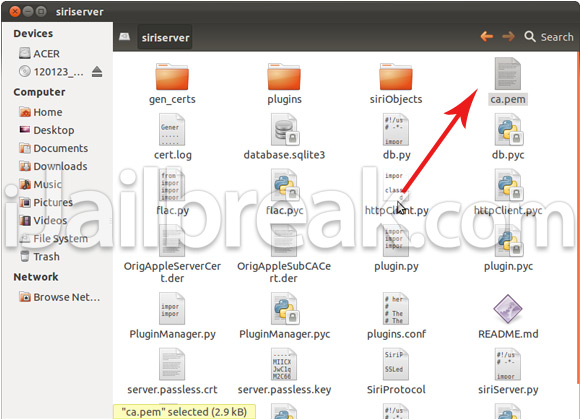
Step 13: After you have entered the command shown above you will find a certificate file named ca.pem in the SiriServer directory (the SiriServer folder that you moved to the Ubuntu root directory). When you see the ca.pem file in the SiriServer directory you will need to copy it to your desktop and email it to yourself.
Section C: Installing The Certificate
Step 14: Now you will need to grab your iOS device, fire up your email client and click the ca.pem file you attached to your email.

Step 15: When you click the attachment you will need to click the Install button, read the warning screen, click the other Install button, and finally click the Done button.
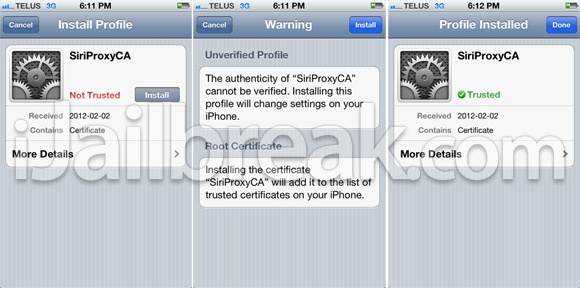
Step 16: With the certificate now installed, you will need to go back into the Settings.app, into the Spire tab and you will need to enter the address of your server. This will be whatever you replaced XXXXX with in step 12.
Example:
OR https://domain.com
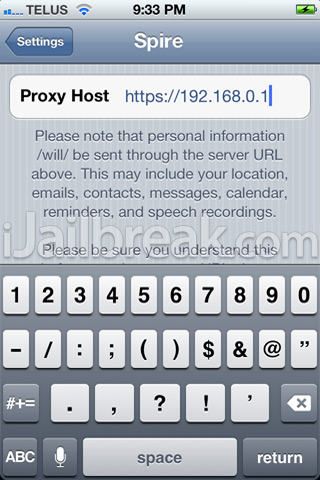
Note: Keep in mind that you are using https not http.
Section D: Activating The Server
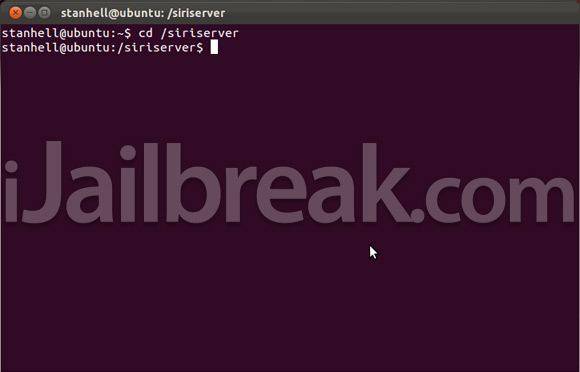
Step 17: Everything has now been configured, and the final step is to begin the server. To do this navigate to the SiriServer directory by entering the following command:
cd /siriserver
Step 18: Finally you will need to enter that command that will turn the server on:
sudo python siriServer.py
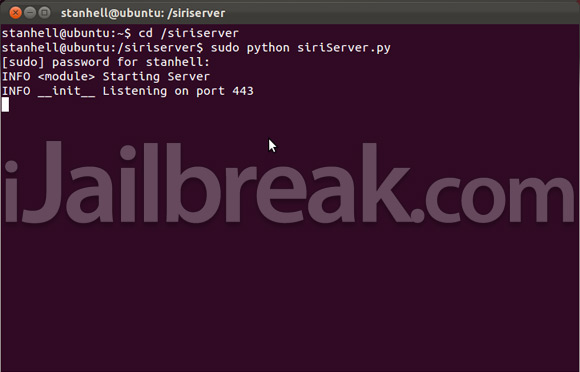
Your server should now be up and running and you can try using Siri on your iOS device. We hope you have enjoyed this how to guide from iJailbreak.com on setting up SiriServer to use Siri on your older generation iOS device with the Spire Cydia tweak. If you are having troubles we suggest visiting the official documentation page by clicking here. Of course you can always leave your questions in the comments section below and we will try and help you out as best as we can.
it dont recognize what i am saying and tells me sorry i dont understand “what i said”
Can anyone confirm that this does indeed work?
so I have to turn on my PC all day to get my siri?
That, or buy a cheap VPS server, install it remotely, and voila!
i tried this and didnt work at all. i could see my phone commnuicating with the computer but save server issues!
why can’t have offline mode siri?
tried it again and worked. but doesnt understand anything LOL!
There is new tweak called MyAssistant + Spire to setup your custom commands or you can say offline siri..!! ;)
Not work
Works well! Woohoo!
Yeah it’s really bad…
Can’t we do the same thing on our Iphone so there will be no need for server we could access siri from our own devices..
It does work, but there are only two things you can do with it.
1) Ask it what time it is and it will say and show you a clock.
2) Ask it the Meaning of life and it will respond with a single answer.
Although there are ways to add plugins to add functionality,
There’s no siri for ipad 2 ?! :( i need it :-D
Please help ! :D
Not working :( Chcesz pomoc ? to pisz na gadu-gadu 25214439.
It does not work for me. It always comes the message “really sorry …”. Port 443 is forwarded. Can anyone help me please.
Siri response limited or not at all. I know it reads me but can give response.
Dictation works flawlessly and quickly. I run it off my MacPro tower with Ubuntu.
Yup, that’s exactly what it does, dictation also works if anyone’s interested in that.
when i downloaded this and entered in the first command it told me i had to enter in a password but when i tried to do that it wouldn’t let me do you have to be a root user to use this
THIS WORKS IN 100% I USE MY LAPTOP LIKE A SERVER AND TAKE MY SIRI WITH ME JAJAJAJAJJA JUST YOU NEED TO KNOW A LITTLE THINGS ABOUT LINUX AND IS EASIER I MAKE MY SERVER IN 10 MINUTES
What kind of attitude you are all done on Linux. If you used Virtual Box, what have you done there yet. For me itgoes wrong with the connection from the server to the device.
Im not using virtual box cuz you will need to consume more of your ram now i need to make a server cuz wille be more easier
look open the terminal “console with ” control + alt + t
type “ifconfig” and check your ip
then when you will gen the certification ca.pem use the ip that you see in the console another thing my friend you need to configure virtual box cuz
your pc has an ip
and virtual box has another so you never will be able to comunicated with the server
make some research about how to configure your virtual machine network
sorry for my english mistake cuz i speak espanish my friend good look
I followed all the instructions and everything goes well till the last step when I try to run the server , I get an error saying: No module named jsonrpclib :(
Please help me
I was today setting it up and it ruined my whole iPad! :(
my iPod and the server have different IP’s HELP PLEASE, how can I get this done?
as do I!!
I’m stuck at last step,
no module named jsonrpclib
please help…thanks
Those who cannot run SiriServer because of jsonrpclib, run the following command:
“sudo easy_install jsonrpclib”
on your ipad go to settings wifi (name) press> and on DNS put your server address (xxxxxxxxxxx) thats it
ok guys this is my question i got everything my siriproxi where it saids Starting SiriProxy on port 443.and certificate installed on ipad same ip on ipad as proxi server but won’t communicated any ideas please thank you.
Help guys, I’m a newbie. on step 7 I’m confuse, which files should I download there are so many of them. thanks
thanks man
at first it work but i accidentally close terminal and i have to do it again but when i do it again that last commend doesnt work and it wont start the server???
i need help on how to start over
ok so I got the server working
INFO handle_accept Incoming connection from (‘10.1.1.16’, 49157)INFO handle_accept Incoming connection from (‘10.1.1.16’, 49158)
loads of incoming connections but siri gives the same answers.
“I’m really sorry about this……try again in a little while”
what did I get wrong? or is this it for now
I have the same problem.
Can you let me know if you’ve found the solution. Thank you
You can download all files. That’s not a problem.
thx. I installed the server on my notebook and it works. But it gives me always the same answer: I did’nt unterstand… Which command does function?
Which command does function. My server works, but it gives me always the same answer: I did’nt unterstand…
Can I communicate with the Server over 3G?
Yes you can.
You need to configure a static IP address on your siri server and port forwarding on your router. Since this seems to use https, you will need to forward port 443 to your siri server.
Yes you can.
You need to configure a static IP address on your siri server and port forwarding on your router. Since this seems to use https, you will need to forward port 443 to your siri server.
In my case I am already forwarding 443 to another web server, so I just changed the siri proxy url to and forward 4444 for siri…
followed the steps correctly but when i go to spire its the usual i cant connect right now…any suggestions??
how do you end the server
Control + C
Can this be run on a vps ?
I got this working and used the few commands successfully. But how do I install the few extra pluggins that weren’t included in the original setup? I’m extreamly new at all of this but ready to learn
i follow all the steps but still siri say sorry……… how….
Same here it always says it dont understand :((
It does not work. I have my laptop via wireless on the network.
Perhaps I have configured the static IP wrong. On the router I have forwarded port. What do I need to know?
Well does anyone knows where to get more plug-ins for this with more answers
most of the commands work but most of them dont.. I can see the weather and note files in the siri folder on ubuntu but when I ask siri it replies “sorry i dont understand” any idea how to fix this ?
How to start siriserver after closing terminal? tq
I had the same problem so I installed Cygwin for Windows and have no problem what so ever. The tutorial is available at
www . mediafire . com/?4r2dk4vit42detp
in the terminal type “easy_install jsonrpclib” it should install the jsonrpc library then.
Thanks Jaden for the mention!
If you need help beyond this guide, please visit #SiriServer on Freenode IRC.
5 Likes and ill make a video tutorial.
Me too any one can help? Pls
Tutorial coming tonight or tomorrow on my youtube channel tzmanitouch.
Video Tutorial.
Video tutorial coming tonight or tomorrow on my youtube channel tzmanitouch.
Video tutorial tonight or tomorrow on my youtube channel tzmanitouch.
I am making a video it will be hope in the next few hours as long as my internet doesn’t stop working will be on youtube just search tzmanitouch and go to my channel follow me on twitter at tzmanitouch for an update when it comes out.
Video is up on my youtube channel tzmanitouch
CRITICAL load_plugins Failed loading plugin due to missing API key: ‘Could not find API key for: wundergrounds. Please check your apiKeys.conf’
i get error “CRITICAL load_plugins Failed loading plugin due to missing API key: ‘Could not find API key for: wolframalpha. Please check your apiKeys.conf'” ANY HELP?
you need to register an api for some plugins
i make it work and now im coding some plugins for testing! i make it work in my ipad =D
so if i do as it says so will i be able to make siri work
yes, currently running this in a Windows VPS and Cygwin :)
noDNS
thanks a lot, followed your tutorial and i have it running in my Windows VPS :)
you need to apply for an APi key in those places.
Glad it worked for you!
is there a way to setup the same siri server in Cygwin but using the iPhone 4s keys?
You need to run this command: easy_install jsonrpclib
im having problems at Step 10. I unzipped the ZIP file and renaed the contents and dragged it to the downloads. it says that the “directory is not empty”
Sorry, but I have no idea. I have an iPhone 4 so I’m not sure how to do that.
sudo apt-get install python-setuptools
this command isint executing like yours and next one giving error.. also M2crypto has not the info like yours any help?
How do you set up a working VPN for the SiriServer so that it is possible to use it over 3G?
how did you change the server url
and how did you configure a static ip and forwarding would really appreciate it
you can code it to do that and create custom commands. You can download a tweak in Cydia that does this. I got a bunch of plugins working so i can ask it a definition, weather, and an encyclopdia. Just apply for some api
I got everything correct but when I try and use siri, it keeps saying incoming connection. It worked before. It doesnt have a speech text anymore, is there anyway i can fix this?
Hi @google-15ede98c5b54765fe1e26b28647a3f54:disqus ,
I think your problem with the cert ! .. generate a new one and install in your iPhone .. make sure you don’t have any other profiles (certs) installed ..
NOTE: certs are different even if u used the same IP !
try, then post here ;)
How do I do this ??
okay so…i set this up perfectly and i got all the api keys,but for some reason all siri returns is “sorry i don’t understand”WHY!?!?!?!
Need an answer for this to
Hey,I cant find M2Crypto in the software center please help ASAP!!!!!!!!! thank you
any help?
there is already a 443 port running (i think). I restarted and started the siri and works fine
p.s. I had the same error :)
Please help me:((
I send certificate file to my email and get it from my iPhone
Then in spire I write my domin
But when I hold home button Siri don’t allow me to speak:((
What can I do?
i make it but siri can’t answer any questions like “how is the weather” and can’t answer when i say hi
it says “i don’t understand hi”
what should i do?
i get this error when testing certs
Error opening server certificate private key file server.passless.key
140041446729376:error:02001002:system library:fopen:No such file or directory:bss_file.c:398:fopen(‘server.passless.key’,’r’)
140041446729376:error:20074002:BIO routines:FILE_CTRL:system lib:bss_file.c:400:
unable to load server certificate private key file
HELP PLZ!
i get terminal to go all the way to listening to port 443 there are no errors at all!
Then when i say hi on my iphone 4 it says sorry blah blah blah blah
Help PLZ!
Update your packages :)
Repeat the last step.
Just close the terminal window :)
how do you install the api of the plugins in the terminal?
It will not work for me it it error can not find api key check your apikeys.conf
You can’t do it in the terminal. Open apiKeys.conf and enter the API key in the corresponding places in the file (you need to register for the APIs first).
Is there a tutorial out there that shows you how to install Siri on Ubuntu without using an iPhone because, I can’t afford one? Thanks.