Yesterday we told you that Sn0wbreeze v2.2 would be released soon, and it just so happens soon is today! iH8Sn0w just released their new version of Sn0wbreeze V2.2 which includes some new features such as baseband preservation mode. This new version of Sn0wbreeze of course also includes support for jailbreaking the iOS 4.2.1 firmware untethered. Right now Sn0wbreeze is the only tool for Windows that mimics the Pwnage Tools functionality. Meaning that it is the only windows jailbreaking tool that can create custom IPSW firmware files (that once restored jailbreaks your iDevice) and it is the only jailbreaking tool for windows that allows you to preserve your iPhone’s baseband.
Before we begin the tutorial on jailbreaking your iDevice with Sn0wbreeze, make sure you see if your iDevice is supported…
Sn0wbreeze only works with the following models:
- iPhone 3G/3GS/4
- iPod Touch 2G/3G/4
- iPad
Note: This tutorial was written from jailbreaking an iPod Touch. Some steps may be slightly different if you are jailbreaking an iPhone, however it will be very similar.
Step 1) – The first thing you are going to need to do is download Sn0wbreeze to your desktop.
Step 2) – Once Sn0wbreeze is downloaded to your desktop you are going to need to extract it.
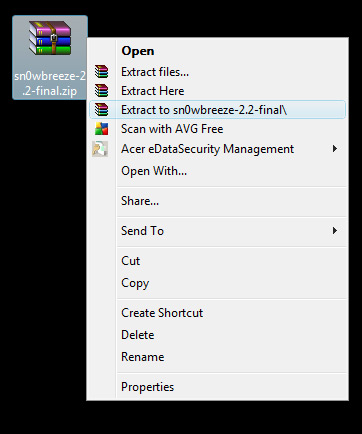
Right click on the sn0wbreeze-2.2-final.zip file and extract it to your desktop.
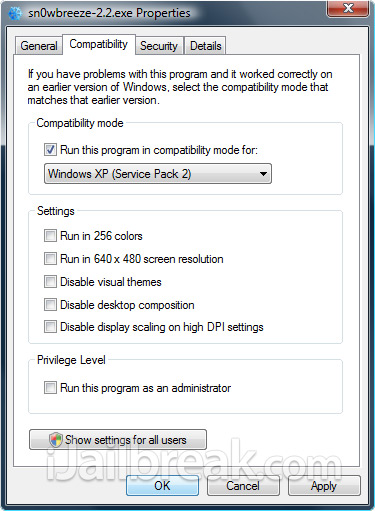
Step 3) – Once Sn0wBreeze is extracted to your desktop navigate to the Sn0wbreeze folder. When you see the Sn0wbreeze.exe right click on it and then go into the properties option. Once a properties window comes up, click the compatibility tap and select the option run this program in compatibility mode for windows xp service pack 2. Once this option is selected click the apply button and then click ok. This will ensure that the program will not run into any errors when running on windows vista or windows 7.
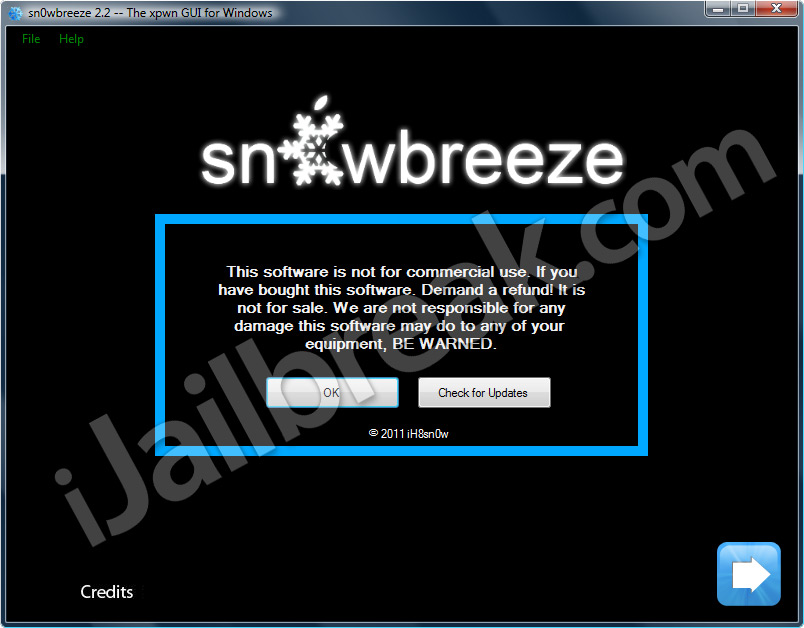
Step 4) – Now that everything is setup with sn0wbreeze make sure iTunes is closed and click the Sn0wbreeze.exe to launch the program (you will need to click yes to run as administrator). Once the program is up and running click ok to the warning message/the credits message and then click the blue arrow to continue.
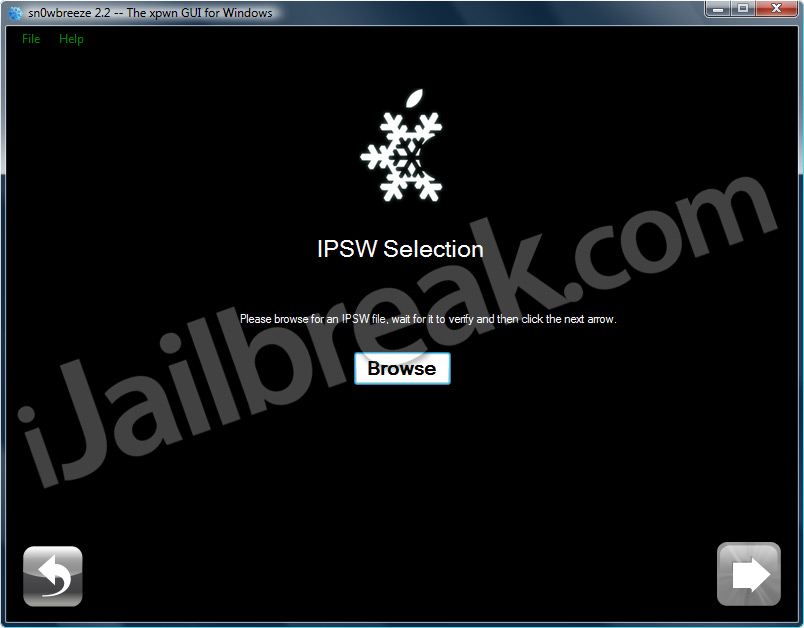
When you get to the next screen you will need to select your IPSW firmware file.
If you need to download your iDevice’s firmware file you can click this link here. Alternatively you can see if you already have downloaded your firmware file by navigating to the specific directories (where Apple keeps your firmware files) below…
Windows Vista: C:\Users\<User>\AppData\Roaming\Apple Computer\iTunes\iPod Software Updates
Windows Xp: C:\Documents and Settings\<User>\Application Data\Apple Computer\iTunes\iPod Software Updates
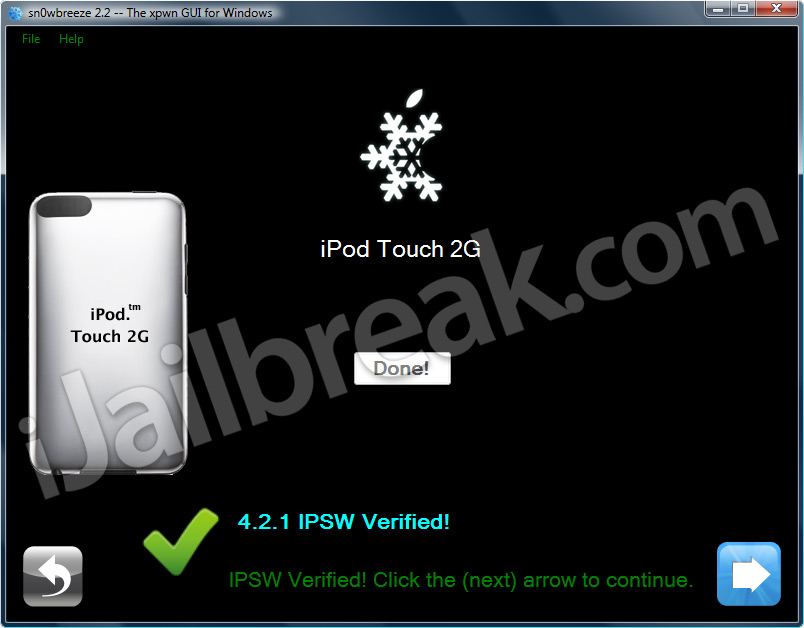
Once you select your firmware file and Sn0wbreeze finishes identifying it, you should have a screen similar to the screenshot below…
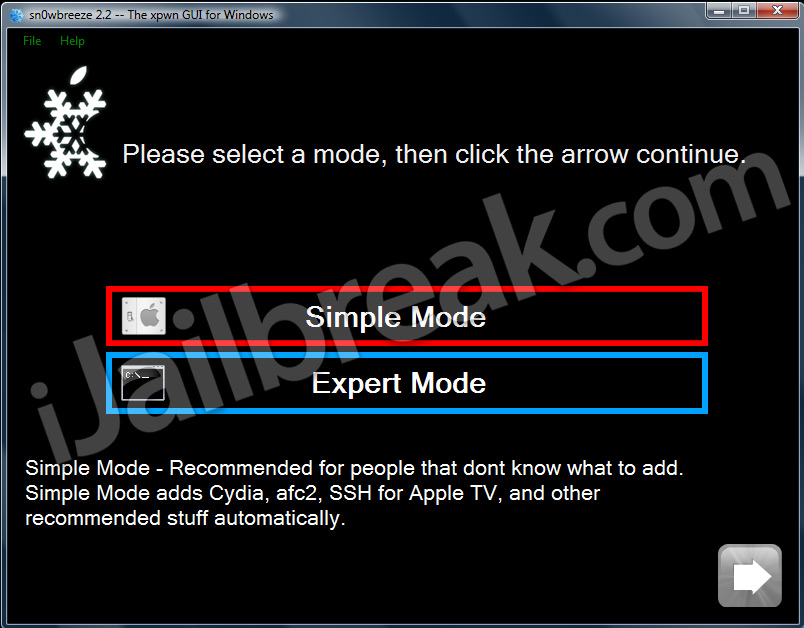
Step 5) – Once you click the next arrow, then next screen you come to should prompt you to select either Simple Mode or Advanced Mode.
Simple Mode – This mode is exactly as it sounds… simple. In this mode you simply select your current firmware and then skip right ahead to the firmware creation process. When using this mode you skip the advanced customization options present in Expert Mode. Only use this mode if you are not interested in customizing your jailbreak.
Expert Mode – This mode is also exactly how it sounds. When you click expert mode you will be brought to a page where you are presented with many options that will customize almost every aspect of your jailbreak. Through this mode you are able to choose pre-installed applications, change your boot logos, choose your allocated partition amount and also have the option of preserving your iPhone’s baseband. Select this mode if you are comfortable customizing your jailbreak or are jailbreaking an iPhone.
Note: Whichever mode you choose is up to you. I will go through both modes in the steps below starting with simple mode. However if you want to preserve your iDevice’s baseband you will need to select Expert mode.
Simple Mode
Step 1) – If you select the simple mode, you really are in for a simple ride. As soon as you click on the simple button and then click the next button Sn0wbreeze will automatically begin creating your custom IPSW firmware file.
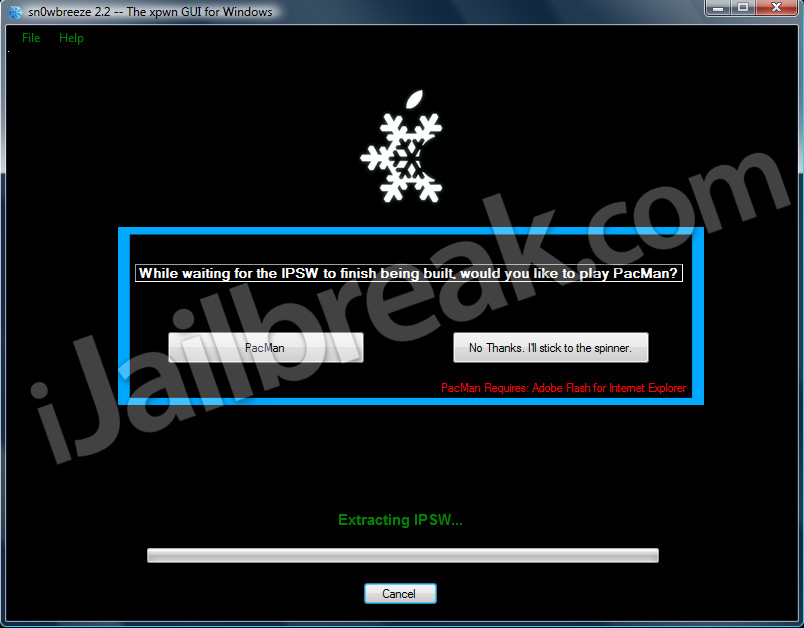
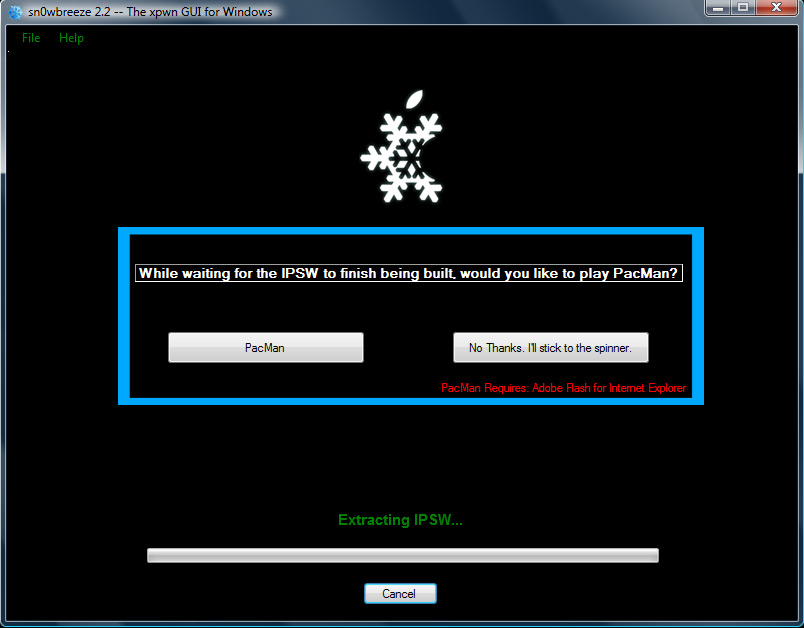
In this new version of Sn0wbreeze you can even play PacMan while Sn0wbreeze is busy creating your custom IPSW file. Once Sn0wbreeze has finished creating your custom IPSW file you can go ahead and follow the DFU mode instructions section (this is located after the Expert mode section).
Expert Mode
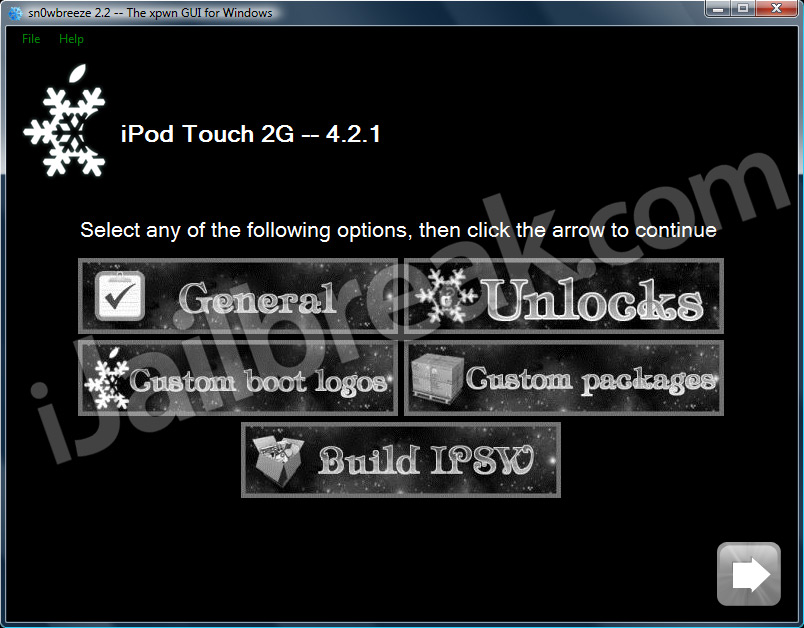
Step 1) – If you chose expert mode to jailbreak your iPod Touch or iPhone you will have many more options on the customization of your jailbreak. Select the expert mode button and then click the blue arrow to continue.
Step 2) – When you have selected your firmware file click the blue arrow button to continue to the next screen. When you get to the next screen this is where the fun begins…
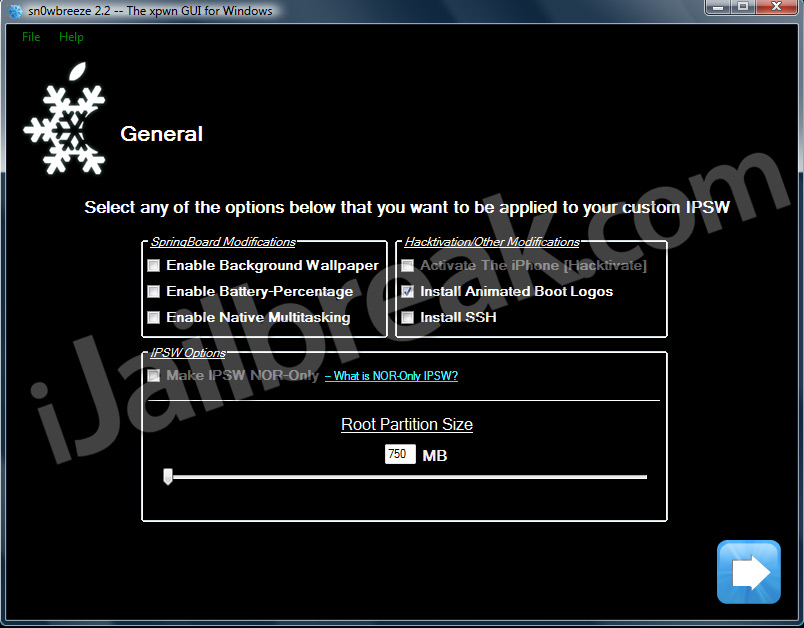
Click the big General button and then the blue arrow to start the customization process.
Root Partition Size: In the first screen you have the option of selecting your root partition size. This is the space that will be allocated to jailbroken apps, themes etc.. A good size is about 1gb but if you have a larger storage space then you can go as high as you wish.
Nor Only IPSW : Another option you have is a nor only ipsw. Only select this if you just wish to change your boot logo. Selecting this option will only add custom boot logos to your iDevice, and will not erase any data.
Springboard Modifications: These options are only for iDevice’s which have iOS 4 restrictions such as the iPod Touch 2G.
Hacktivation/Other Modifications: These options are only for users with iPhone’s, or for those who wish to install custom Boot logos/SHS services.
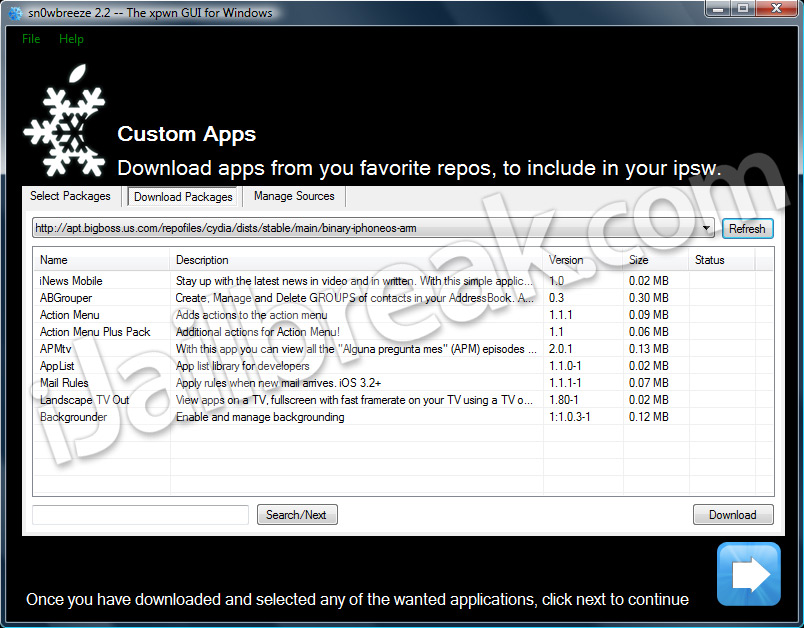
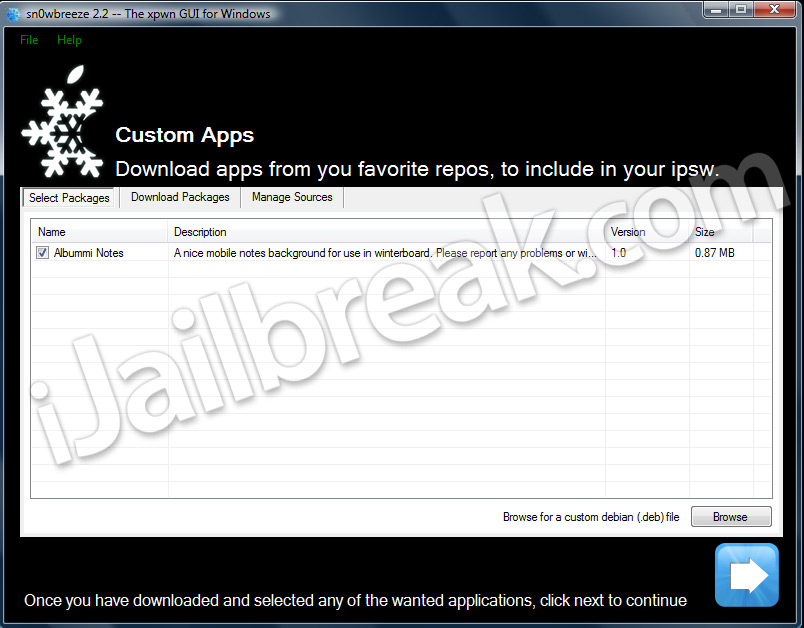
The next option you have is if you want to have any pre installed applications. Click the Download packages tap and click on a source you wish to browse through to find applications. When you find this source click the refresh button and select any applications or themes you wish to have pre-installed and click the download button.
When you have downloaded all the packages you are interested in go back into the select packages tab and check the applications/themes you wish to have pre installed. Once you are happy click the blue arrow button to continue…
Note: As I was not jailbreaking an iPhone, my customizing ended here. If you are currently jailbreaking an iPhone then you will need to go through the unlock tab and select the options you require. Don’t worry they are self explanatory.
Step 3) – Once you are done editing your firmware file you will need to click the build ipws button and the next screen you should be on is the actual firmware creation screen.This process can take anywhere from 5-10 minutes so be patient. Once you firmware file has been created it will be located on your desktop.
A new feature to Sn0wbreeze V2.2 is the ability to play pacman while Sn0wbreeze is creating your custom IPSW tool! Once Sn0wbreeze has finished creating your custom IPSW file you can go ahead and follow the DFU mode instructions section (located below).
DFU Mode Instructions
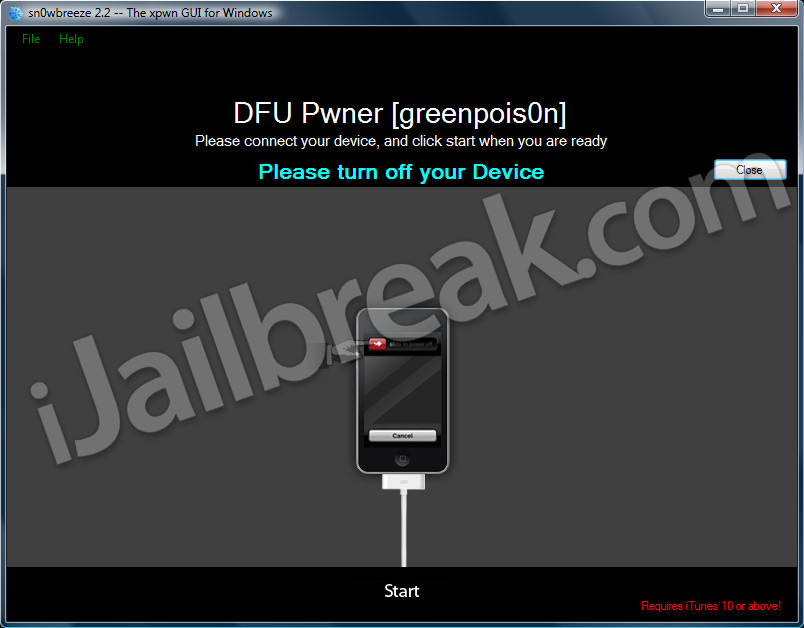
Once you get to the point where you need to put your iDevice into DFU mode, you will need to simply follow Sn0wbreeze’s real-time instructions. Once you do this, your iDevice will be in DFU mode and you can restore your custom IPSW firmware file.
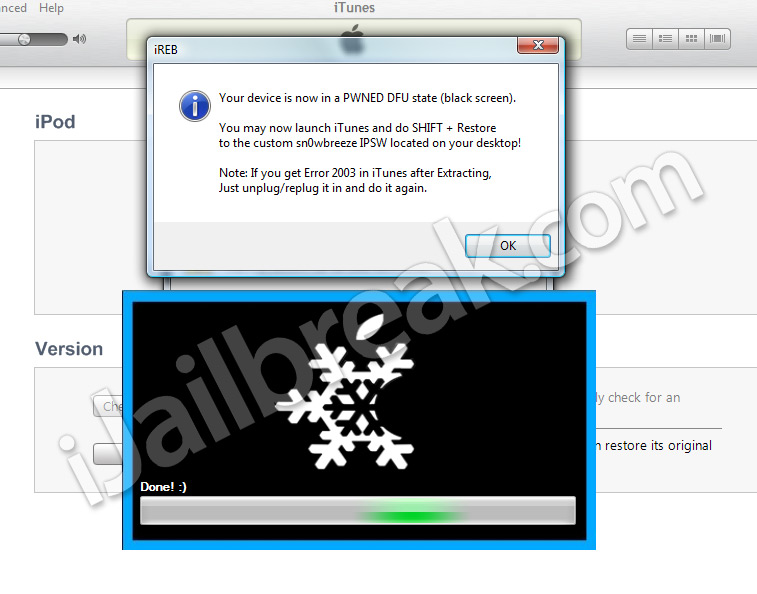
After following Sn0wbreeze’s real-time instructions EXACTLY as shown, iTunes should launch and you will be at a screen that looks something like the screenshot below…
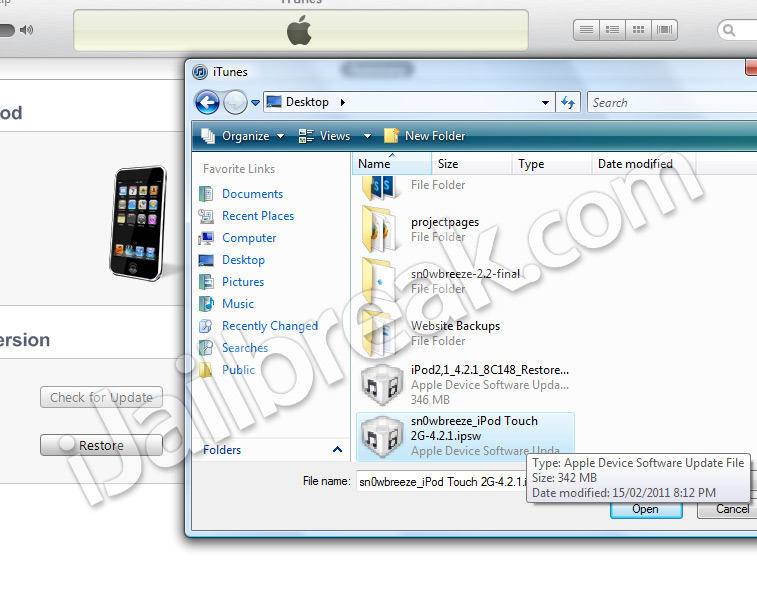
Once iTunes launches you are prompt by Sn0wbreeze saying iReb is successfully running, you can go back to iTunes and SHIFT click the restore button. Once you have done this you can now select your custom IPSW firmware file to restore to your iDevice.
After selecting your custom IPSW firmware file, your iDevice should now start to restore (this can take up to 20 minutes)! Once your iDevice finishes restoring you will have a successfully jailbroken iDevice. Let us know if this tutorial helped you jailbreak your iDevice and also let us know if you have any questions regarding the tutorial. We will try our best to answer any questions that come up.
wStep 4) – When the firmware creation process is finished close sn0wbreezer and launch iTunes. Plug your iPod Touch or iPhone into your computer if it isnt already and put your iPod Touch or iPhone into DFU Mode. If you do not know how to do this follow this tutorial here.
Once your iPod Touch or iPhone is in DFU Mode then shift click the restore button and select your custom firmware.
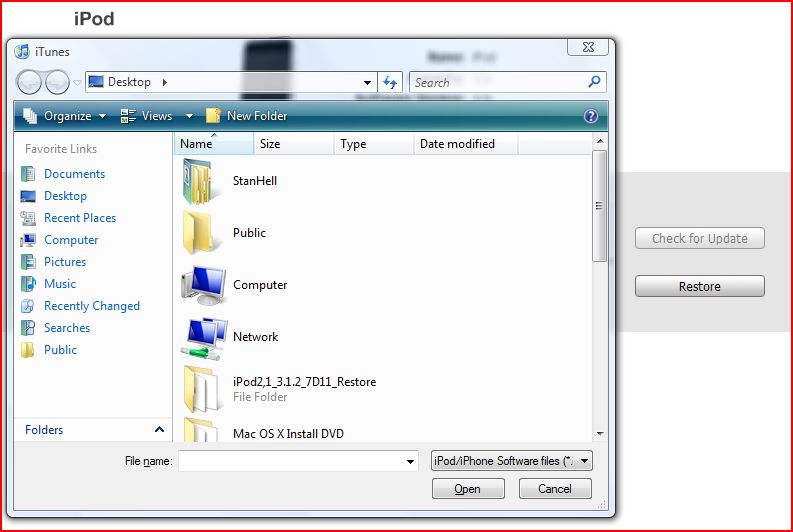
Hold shift and click on the Restore button and then locate your custom firmware file on your desktop
Wait for your iPod Touch or iPhone to finish restoring which can take up to 20 minutes and wait for it to reboot. Congratulations you have now successfully jailbroken your iPod Touch or iPhone with Sn0wbreezer.
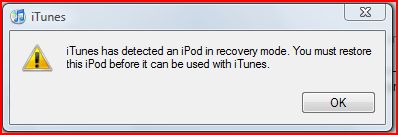
i keep getting error1600 please help me twitter jimbobpro87
Well done Jaden.
Thanks Mike I appreciate it!
Hey Jim, just about to head off here for the night. I will get back to you on this error tomorrow morning sometime. If you do not want to wait for a more in-depth answer I suggest going through the steps one more time and ensuring you entered DFU mode correctly.
Also Try switching USB ports that you have not used before.
Does jailbreak and unlock ur iPhone? and what does this mean “Root partitions size”? Is this partitions for Cydia apps?
Yeah, typically the 1600 errors are to do with not entering DFU mode properly.
Root Partition Size means it is the space allocated for Cydia Apps. And This only jailbreaks your iPhone. However it allows you to upgrade to the iOS 4.2.1 firmware while preserving an unlockable baseband, so you can use ultrasn0w to unlock. If you are on the iOS 4.2.1 firmware stock however this will not work because your baseband version will be unsupported. Hope this helps!
dude when is the carrier unlock coming fo 3gs on 4.2.1 and modem firmware 5.14.02
Tried this 5 times now with the same resukt each time. after restore is complete, the ipod touch goes black, no reboot, and cannot turn on. Itunes just tells me it needs restoring
that means i can use the ultrasn0w to unlock it?? do you have the repo of ultrasn0w?
Thanks for writing such an in-depth article. Awesome !
I have 1 questions, after creating the custom ipsw, we are just doing a shift+restore in itunes in the DFU mode. My question is, are we not supposed to use TinyUmbrella and start TSS server, to avoid iTunes to upgrade the baseband while shift+restore?
This is just a doubt and I do not want to risk my unlocked 3GS by trying myself.
Regards,
Pawan
So what’s the difference with this and GP? Is it just the way you can customize things?
Also this does use the GP exploit right? So basically if I’m having trouble with GP draining my battery it, this JB wouldn’t make any difference right?
I’m on an iPhone 3G, running 4.0.1 that is jailbroken AND unlocked to run on another network.
So, before I start anything. I make sure I upgrade to the latest version of iTunes, right? Then, I plug my iPhone & sync it as well.
Then, after this, I start the whole process above.
Now, after that is all finished, all of my data/text messages, etc. Will be deleted b/c of DFU mode, right?
My problem is, this is my wifes phone, & she has played many games (mostly fruit ninja & angry birds, lol). She has passed through a LOT of levels). B/c of DFU mode, all of this will be wiped out. Can I restore all if this data (mostly texts & game data) from iTunes with a sync after successful jailbreak?
Thanks,
Shawn
Anybody, please advise on my query above.
Regards,
Pawan Pillai
very detailed. Thanks a lot!
first – thank you u for all the Awesome jailbreaks!
i’ve ipod touch 2G, and after i put my iDevice into DFU mod the itunes doesn’t rise up, and i can’t restor my ipod with the “sn0wbreeze_iPod Touch 2G-4.2.1” ?!
help me pleas!!!
Tanks,
hillel
Help… my iphone 3G turn to ipod after i did the sn0wbreeze? how to turn by iphone 3G back ??? help…
i got 1500 error in this process my iphone shows green disc symbol with itunes and datacable plugin symbol on display what i have to done now??
please suggest me what i do for solve this problem??
thanks a lot very helpful stuff