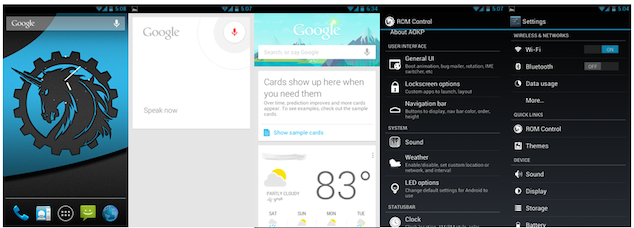
Here is some good news brought by one of the developers at XDA Developers (rukin5197). You can now have an Android 4.1.2 Jelly Bean based AOKP ROM on the HTC One V. One of the main features of this ROM is it provides a lot of customization options. You get a more precise keyboard, increased speed and a sleek interface. Voice recognition features and actionable notifications are present as well.
Caution is advised for the usage of this ROM as it is only going to work on the GSM variant of the HTC One V. Since this ROM is still undergoing performance improvements, there might be some bugs.
Now we are going to take a look at the flashing procedure.


Caution
- Before proceeding to the installation of this ROM read all the instructions carefully and make sure that you understand each and every step before you actually go through with it.
- These guidelines are specifies only for the HTC One V GSM. If you try to use it on another device or model, then there is no guarantee that the same results will be produced.
- Disable any security software on your computer that is known to access the device. They have the potential of interfering with the process.
- These instructions are to be applied by the owner at his own risk. Any damage occurring will not be our responsibility. The protocol being provided may or may not work accordingly depending on your specific conditions.
Specifications
- ClockworkMod Recovery (link) should be installed on your HTC One V GSM with an unlocked bootloader (link).
- The following files have to be downloaded:
- Latest AOKP Jelly Bean nightly build for the One V GSM (link)
- GApps (Google Apps) package for the One V GSM (link)
- Fastboot package (link)
- It is imperative that your device be fully charged or the battery level should be at a minimum 70%.
- Apart from the battery, you also need to create a backup for your important data. This data includes your personal data like contacts, messages, settings, etc.
Procedure
- In the downloaded files go to Fastboot.zip and unzip it. The folder you get will be named ‘Fastboot’.
- In a same manner, access the AOKP ROM ZIP file and from it, extract the boot.img file. You have to copy this file to the folder named ‘Fastboot’.
- Having done this, copy the AOKP ROM and Google Apps package to the internal SD card of the device.
- Switch off your phone. When you turn it on it should be in HBOOT. You can boot into this mode by pressing the ‘Volume Down’ and ‘Power’ button till HBOOT boots. You can scroll down the menu using the Volume keys. Highlight ‘Recovery’ and then select it by pressing the Power button. This will take you to Recovery Mode.
- Now you are going to make a backup of the existing ROM. To do this go to ‘Backup and Restore’. Now select ‘Backup’.
- After the backup, proceed to the option that says ‘Wipe data/factory reset’. Confirm this action.
- In a similar fashion, select ‘Wipe cache partition’ and confirm as you did earlier.
- Go back to the main menu where you would find the option ‘Advanced’. Select ‘Wipe Dalvik cache’, and confirm the task.
- All the pre-installation tasks have been completed and now you can select ‘Install ZIP from SD Card’. Once you do this select ‘Choose ZIP from SD card’. Find the AOKP ROM file, select it and confirm the installation.
- Repeat the previous step in order to install the Google Apps package.
- Now you are going to boot the phone once again into HBOOT.
- In the HBOOT menu you can find ‘Fastboot’. Select it to proceed to Fastboot mode.
- Using a USB cable, connect your phone and computer. The screen (bootloader) will show ‘FASTBOOT USB’ if this has been done correctly.
- Access command prompt on your system and then modify the directory to the ‘Fastboot folder’.
- In order to confirm the successful connection of the phone and computer, enter the following command: fastboot devices. If successful, then you should see the phone serial number on the screen.
- Now enter the following command: fastboot flash boot boot.img.
- Once you have done this you will get a message that says “finished/OKAY”.
- Now detach your phone from the computer and reboot it.
Enjoy the delights of having the AOKP Jelly Bean ROM on your phone! Feel free to leave any comments below if you experience any problems.
For more custom ROMs for your Android device, and for more guides on how to install custom ROMs to your Android smartphone or tablet, check out iJailbreak’s Android ROMs section.
Hi can anyone help me?
I followed all the steps, but my phone is not starting. it get stuck on a “HTC quietly brilliant” screen with the follow message:
“This buil is for development purpose only
Do not distribute outside of HTC without HTC’s written permission.
Failure to comply may lead to legal action”
Can any one help me, please?
Further information. I change the boot.img file used in the last command to the latest .img boot-TK-USB-CM10-OC-VDD-201210112240.img and now the phone is working.
UHUUUUUUUU thanks anyway
Hi Chirstian how did you move to the cwm from that screen I cannot go anywhere
wan help contact me ucantseeme.sanwal@gmail.com