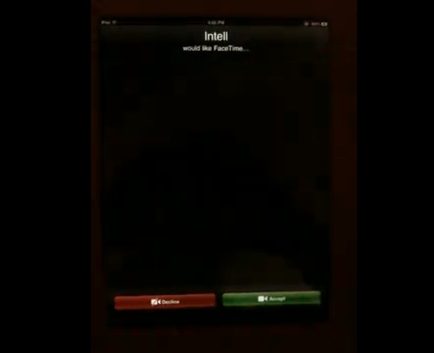
Today a cool new hack for the iPad was discovered that will allow you to use FaceTime on your Apple iPad! What this hack actually does to enable FaceTime on the iPad is it installs the iPod touch 4 FaceTime.app on your iPad. This iPod Touch 4 FaceTime.app has been with modded to fit your iPad’s screen and it also has an optimized user interface. Now I know what you must be thinking, my iPad doesn’t have a camera how can I use FaceTime? Well this is an obvious fact that the iPad does not feature a camera, so the developers of this hack have made it so the iPad only captures Audio. This means you will be able to see your other FaceTime partner, but they will only be able to hear your voice.
If this sounds like a hack you would be interested in to try on your iPad, then you can follow the tutorial below…
Note: You will need the following files to go through with this hack. We unfortunately cannot link or upload any of these files, because it would break copyright laws.
- Conference.framework
- IMCore.framework MobilePhone.app
- ConferenceRegistrationSettings.bundle
- AVFoundation.framework
- Celestial.framework
- UISounds folder all from iPhone 4 or iPod Touch 4 firmware
- Jailbroken iPad running 4.2.1 (works on untethered and tethered)
If you managed to get all of the folders, congratulations, lets begin.
Step 1) – SSH to /System/Library/PrivateFrameworks/
Step 2) -Rename Conference.framework to ConferenceiPad.framework and IMCore.framework to IMCoreiPad.framework
Step 3) – Upload the Conference.framework and IMCore.frameworks from the iPod Touch 4 or iPhone 4 to /System/Library/PrivateFrameworks/
Step 4) – Navigate to /System/Library/CoreServices/SpringBoard.app/ and download the K48AP.plist for editing.
Step 5) – Add
<key>venice</key> <true/>
under the capabilities array, then upload the modified version to SpringBoard.app on the iPad replacing the unmodified version
Step 6) – Upload the ConferenceRegistrationSettings.bundle from the iDevice 4 to /System/Library/PreferenceBundles/
Step 7) – Navigate to /System/Library/Frameworks/AVFoundation.framework/K48/ and rename AVCaptureSession.plist to AVCaptureSession.bak2
Step 8 ) – Upload the AVCaptureSession.plist from the iPod Touch 4 /System/Library/Frameworks/AVFoundation.framework/N81/ or /System/Library/Frameworks/AVFoundation.framework/N90/ from the iPhone 4
Step 9) – Navigate to /System/Library/PrivateFrameworks/Celestial.framework/K48/ and rename AVCapture.plist to AVCapture.bak2
Step 10) – Upload the AVCapture.plist from the iPod Touch 4 /System/Library/PrivateFrameworks/Celestial.framework/N81/ or /System/Library/PrivateFrameworks/Celestial.framework/N90/ from the iPhone 4
Step 11) – To get the sounds woking navigate to /System/Library/Audio/UISounds/ and put vc~ended.caf, vc~invitation-accepted.caf, and vc~ringing.caf from the iDevice 4 into the iPad’s UISounds folder
Step 12) – Navigate to /Applications/Preferences.app/ and download the Settings.plist
Step 13) – Remove the requieredCapabilites key from item number 26, save, then replace the version on the iPad with modified version
Step 14) – Edit the info.plist in the MobilePhone.app that is from the iDevice 4. Change CFBundleDisplayName~ipod to CFBundleDisplayName~ipad, CFBundleIconFiles~ipod to CFBundleIconFiles~ipad, CFBundleURLTypes~ipod to CFBundleURLTypes~ipad, UILaunchImageFile~ipod to UILaunchImageFile~ipad, and add a 2 to the UIDeivceFamily array (For help with adding the 2 visit this link)
Step 15) – Replace the Default~ipod.png with the attached file
Step 16) – Navigate to /System/Library/PrivateFrameworks/TelephonyUI.Framework/ and rename bottombarknobgreen.png to bottombarknobgreenT.png
Step 17) – Reboot and enjoy FaceTime

[Via 9to5mac]
Leave a Reply