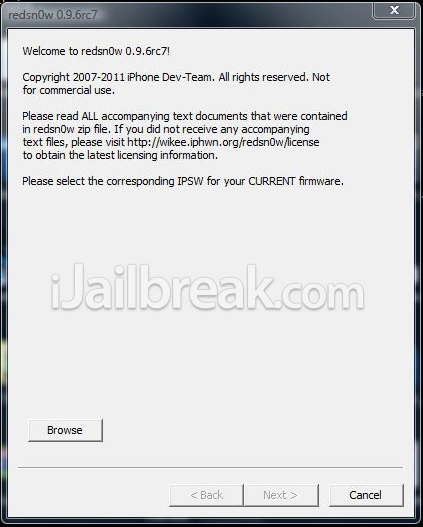
About an hour ago we told you that the Dev-Team released an updated version of RedSn0w to include a new feature to help better manage iDevices that are tethered. This new version of RedSn0w unfortunately IS NOT the untethered jailbreak for Windows, it is, as we said before, simply a new update of redsn0w which includes a new command line feature to boot tethered iDevices. With this new addition to RedSn0w, instead of launching RedSn0w directly to boot your tethered iDevice, you can simply type in some commands into CMD/Terminal and your iDevice will reboot back into its jailbroken state, just as if you had clicked the Just boot tethered for now button, via redsn0w’s GUI.

Step 1) – The first thing you will need to do is Download RedSn0w 0.9.6rc7, to your MAC or WINDOWS computer. You can do this now by clicking one of the corresponding download links below…
- OSX
- Windows
Step 2) – Now that you have downloaded RedSn0w to your computer, we can begin prepping for executing the terminal commands. The next steps will be different, if you are on WINDOWS opposed to MAC and vica-versa, so follow whichever section is relevant to you.
WINDOWS USERS ONLY
If you are on Windows you will need to transfer the following files to your C: DRIVE:
- redsn0w.exe
- boot-ipt4g

Once you have transferred the two files listed above to your C: drive you can continue to step 3.
Note: If you are on Windows Vista or Windows 7, you will need to enable redsn0w to run in compatibility mode for Windows XP.
Do this by right clicking on the redsn0w.exe, and clicking the properties option. Once you click the properties option, you will need to go into the compatability and then enable run this program in compatibility mode for windows XP.

Once you have done this you can also continue to step 3.
MAC USERS ONLY
For Mac users this will be an easy step for you! All you will need to do is transfer the following files to your Desktop:
- redsn0w.app
- boot-ipt4g.command
Once these files are transferred to your desktop, you can continue to step 3.
Step 3) – Now that you have the two redsn0w files in the correct directory, you will simply need to transfer your current firmware file to that same directory as well (which will obviously be your iOS4.2.1 firmware file). This means that once you have completed this step, you will have three files in your corresponding directory.
Step 4) – With your files placed, you can now launch CMD from your WINDOWS computer (simply search for CMD.exe, if you do not know where it resides on your computer), or Terminal from your MAC computer.

Once terminal is up and running, this is where things get a little bit more tricky.
If you are an experienced terminal/CMD user, here are RedSn0w’s command line arguments:
- -j to ask redsn0w to “Just boot now tethered for now”
- -i <filename> to specify your reference IPSW
- -o for old-bootrom iPod touch 2G and iPhone 3GS
- -b <filename> to specify your own boot logo png
Now obviously if you are not experienced in working with Terminal/CMD, this will not be much use to you. Luckily though, we are going to guide you through the rest of the process.
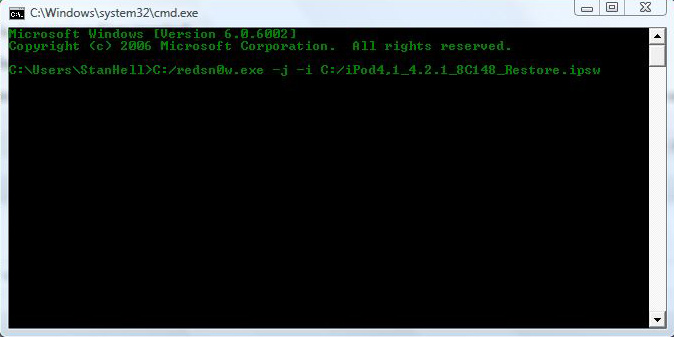
If you are on WINDOWS, you are going to type in the following command into CMD:
C:/redsn0w.exe -j -i C:/iPod4,1_4.2.1_8C148_Restore.ipsw
**You will need to replace the end firmware file name, with your iDevices corresponding firmware. The example above is referring to the iPod Touch 4G’s firmware file.

If you are on MAC, you are going to type in the following command into terminal:
open ~/Desktop/redsn0w.app —args -j -i ~/Desktop/iPod4,1_4.2.1_8C148_Restore.ipsw
**You will need to replace the end firmware file name, with your iDevices corresponding firmware. The example above is referring to the iPod Touch 4G’s firmware file.
Step 5) – If you successfully execute the terminal commands above, RedSn0w should launch to guide you through DFU mode. Once your iDevice enters DFU mode, your iDevice will reboot into its jailbroken state!
As you can see, for some of you this may be easier than launching RedSn0w everytime you want to reboot your tethered iDevice. However, I know for some of you, you will still prefer to simply use RedSn0w’s GUI. Whatever option you prefer is up to you, let us know your thoughts on this new feature of RedSn0w!
Or even easier (Windows): create a shortcut to Redsnot and pass the command line arguments from it. One double click and you’re done.
Yeah thats right ih8sn0wtoo, I managed to do that and create some easy to use .bat files!
On a Mac, you could just use Automator and turn it into a one-click tethered boot.
Awesome, was wondering what the MAC alternative to Windows batch files was. Thanks a lot Rycr :)
I dunno…. I’ve just tried it the first time and I’m having to restore my iPod 2g to factory settings because something messed up and I couldn’t turn it back on… I hope it works better the second time…
Okay, take it back! Works great!
Okay, now I have a problem: the multitasking doesn’t want to work on my iPod 2nd generation 8gb. Up there where it says “-o for old-bootrom iPod touch 2G and iPhone 3GS” mean I should insert that into the command when jailbreaking the iPod that is 2nd gen?
@echo off
title iPod Touch 4G iOS 6.1.3 Boot
cls
(redsn0w.exe -i=Boot -j & exit)